Manually Injecting ReShade
Some games block the usual graphics API hooks that ReShade uses to load at startup. When this happens, the standard installation method does not work, since ReShade’s DLL cannot attach through the normal renamed file method. This is common with UWP (Microsoft Store) games and titles that use protected launchers.
To get around this, Crosire created a small injection tool that lets you manually load ReShade into the game while it is running. This guide covers how to inject ReShade using that tool.

Determine Game Architecture and Rendering API
Before manually installing ReShade, identify two key details about your game: its bit architecture (32-bit or 64-bit) and the Rendering API it uses (DirectX 9, 10, 11, 12, or OpenGL).
If you're not sure about either of these, you can usually find the information on PCGamingWiki.
Download the ReShade Injector
Choose the injector that matches your game's architecture:
Download the ReShade Setup Tool
Download the latest ReShade Setup Tool from the ReShade website.
Extract the ReShade Binary
The ReShade Setup Tool is distributed as an executable, but its contents can be extracted using an archive manager such as 7-Zip or WinRAR. This guide uses 7-Zip.
- Right-click the ReShade Setup Tool executable and select Open archive with 7-Zip.
- A window will open showing the files inside the installer.
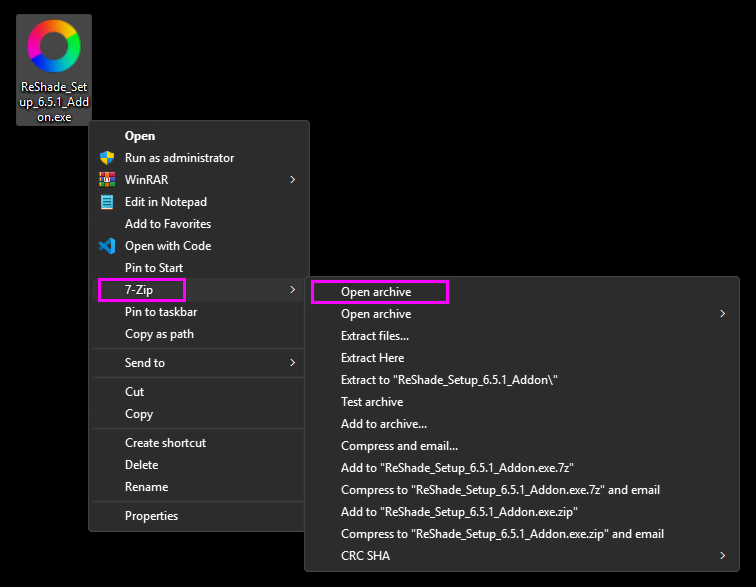
Inside, you will find two DLL files. Choose the one that matches your game's architecture.
Drag the correct DLL to your game's folder. This is the same folder that contains the game's executable.
If you are unsure where that is, right-click your game in your launcher (Steam, GOG Galaxy, etc.), select Manage or Browse local files, and look for the folder containing the executable. Alternatively, see our guide for finding your game's executable.
Install Shader Repositories and Add-ons
After injecting ReShade, you need shaders for it to have any visual effect. Without shaders, ReShade will not change the game’s appearance. See our guide for manually installing shaders for instructions on downloading, extracting, and placing shader repositories in the correct folder.
You can also add functionality to ReShade through Add-ons. Step-by-step instructions are in our guide for manually installing Add-ons.
Manually Inject ReShade
- Close your game.
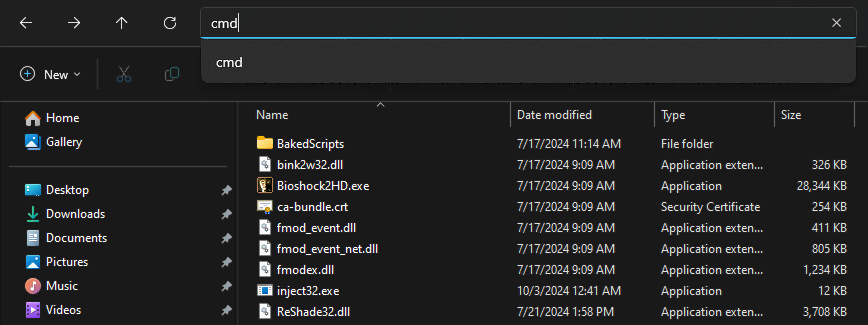
- Navigate to your game's folder.
- Open a command prompt by typing
CMDinto the File Explorer address bar.
- Type the injection command:
inject[32/64].exe "name_of_the_process.exe"Replace[32/64]with your injector’s architecture and"name_of_the_process.exe"with your game's executable name. Press Enter.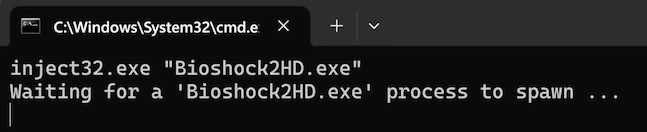
- Launch your game. If the injection succeeds, you will see the "ReShade is now installed successfully" banner at the top of your screen.