ReShade Setup Tool
The ReShade Setup Tool is the official installer from reshade.me. It runs you through a step-by-step process to get ReShade, known shader repositories, and add-ons working in your game.
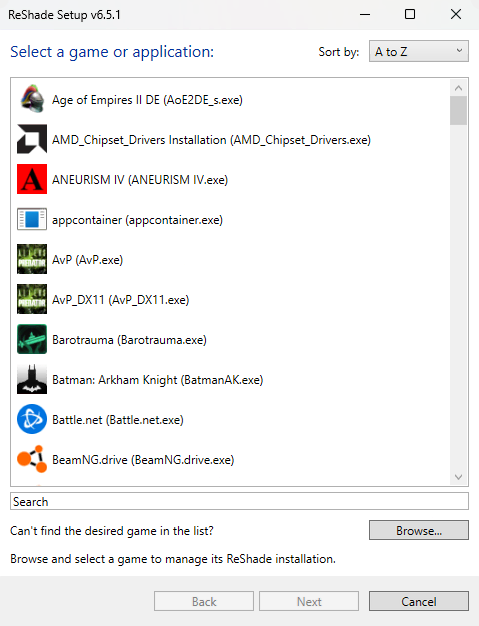
Selecting Your Game
The tool lists detected applications to install ReShade to. Select the game's main executable (e.g. game.exe). ReShade installs into that executable's directory. For unlisted games, use Browse... to select the executable. If the game folder is protected (e.g. Program Files), run the setup tool as administrator. See finding your game's executable and directory.
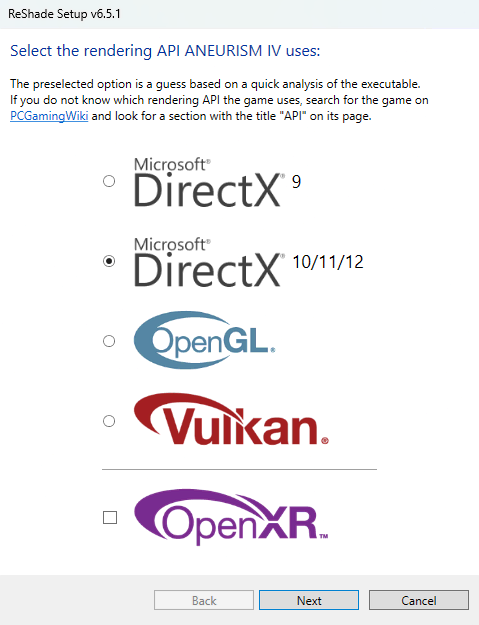
Selecting the Rendering API
ReShade must use the same rendering API as the game. Options are Direct3D 9, 10, 11, 12, OpenGL, or Vulkan. The wrong API can prevent injection. Check the game's graphics settings, documentation, or PCGamingWiki for the API.
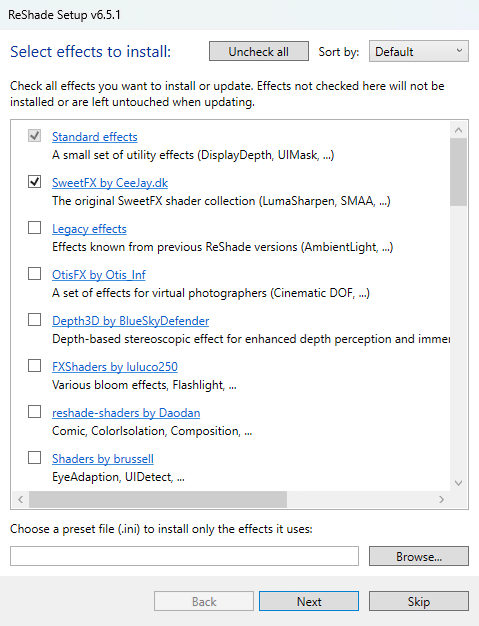
Installing Shaders & Presets
ReShade only changes the image if shaders are installed. Select one or more shader repositories to install (clicking a repository name opens its GitHub page). To install a preset (e.g. a .ini file), use Browse... to select it - and the ReShade Setup Tool will install it and the required shader packages that the preset references.
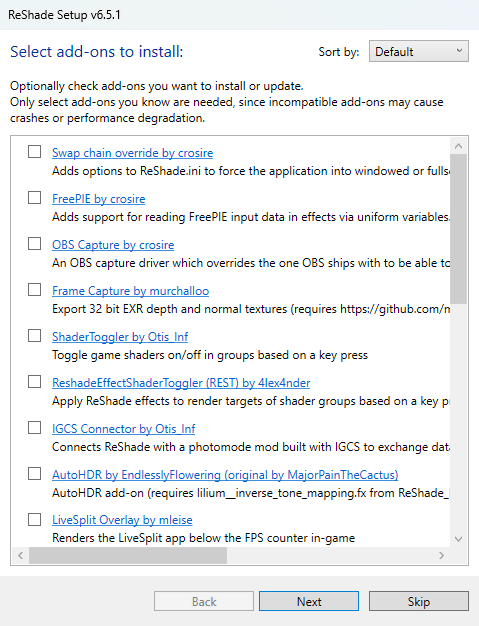
Installing Add-ons (Add-on Support Build Only)
Only the full add-on support build and its matching setup tool show the add-on step. Add-ons are optional DLLs that extend ReShade or the host application (e.g. extra overlays, capture tools, or game-specific hooks). The tool lists available add-ons with descriptions. Review each add-on before installing as some can cause compatibility issues, launch failures, or installation problems. Install only add-ons you trust and need.
Finishing Up
Launch the game. A banner at the top confirms ReShade is installed and shows the overlay key (default Home, which is changeable in ReShade's settings). If the banner does not appear, verify the correct executable and rendering API were selected and rerun the setup tool.
