Manually Installing ReShade
Sometimes the ReShade Setup Tool doesn’t include everything you need or may not work with certain games. This guide shows how to install ReShade manually, giving you full control over the process.
Identify Your Game’s Architecture and Rendering API
Determine whether your game is 32-bit or 64-bit and which rendering API it uses (DirectX 9, 10, 11, 12, or OpenGL). If you’re unsure, check PCGamingWiki for detailed information on your game’s requirements.
Download the ReShade Installer
Go to the official ReShade website and download the latest installer. You won't run the application, instead, you’ll extract its contents.
Install 7-Zip
Download and install 7-Zip from 7-Zip’s official site. This free utility lets you open the ReShade installer archive.

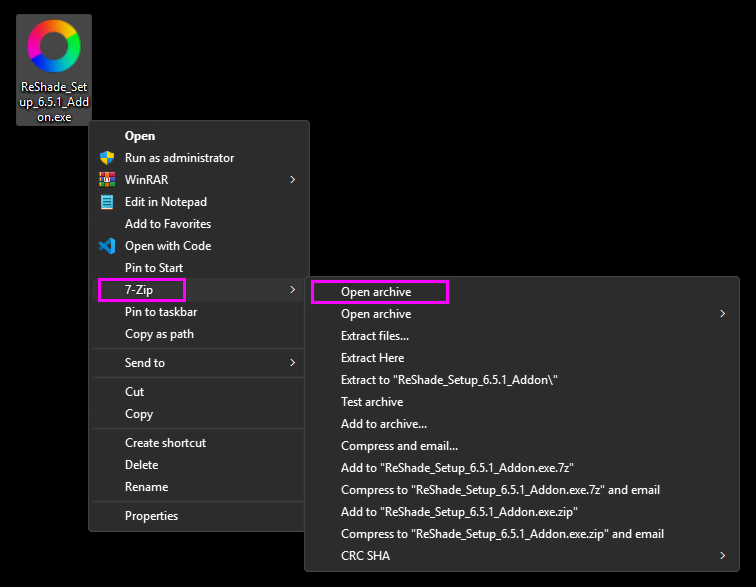
Extract the ReShade DLL
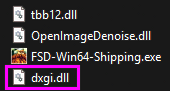
Right-click the downloaded ReShade_Setup_x.x.x.exe file, hover over "7Zip" and then click "Open archive", then locate and drag the DLL matching your game’s architecture to your desktop.
| Game Architecture | DLL Name |
|---|---|
| 32-bit | ReShade32.dll |
| 64-bit | ReShade64.dll |
Rename the DLL File
Change the DLL’s name to match your game’s rendering API so the game will load ReShade at startup:
| Rendering API | New DLL Name |
|---|---|
| DirectX 9 | d3d9.dll |
| DirectX 10 | d3d10.dll |
| DirectX 11 | d3d11.dll |
| DirectX 12 | d3d12.dll |
| OpenGL | opengl32.dll |
Move the DLL to Your Game Folder
Copy the renamed DLL into the folder containing your game’s executable (.exe). If you need help finding this folder, follow our guide on finding your game’s executable and directory.
Final Checks and Launch
Confirm the DLL is correctly named and placed alongside the game’s executable. Launch the game—if ReShade installed successfully, you’ll see its overlay on startup. Press the default key (usually "Home") to open the ReShade menu and begin customizing shaders and settings.
