FiveM
FiveM is a platform that lets you play on custom servers for Grand Theft Auto V (GTAV). Getting ReShade working with FiveM takes a few extra steps, since ReShade has to be moved into FiveM's own plugins folder. This guide walks you through the whole process.
Enable Windows File Extensions
You need to be able to see file extensions in Windows to follow this guide. Extensions are the parts at the end of file names that indicate the file type, like .exe or .dll. Follow our guide for enabling Windows file extensions first.
Install ReShade to GTAV
Download the latest Add-on Support build of ReShade from the official ReShade website. Install it into your GTAV game folder and do not include any add-ons during setup. If you need help, see our ReShade installation guide.
Locate your GTAV Folder
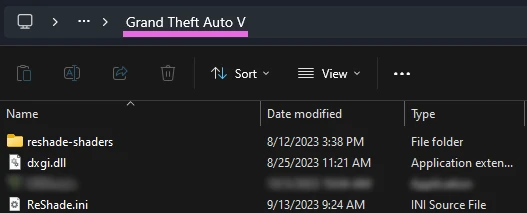
Find your GTAV game folder, where the main game files are stored. If you're unsure how to find it, use our guide for finding your game's executable. Confirm these files and folder are present before continuing:
dxgi.dllReShade.iniReShade-Shaders
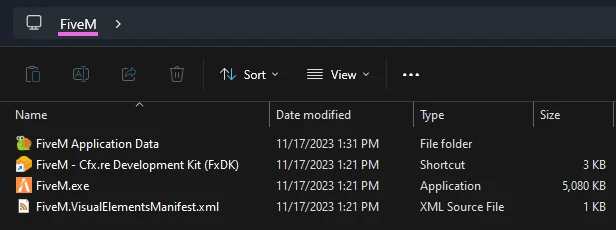
Locate your FiveM Installation
Find the folder where FiveM is installed, using the same method as the previous step.
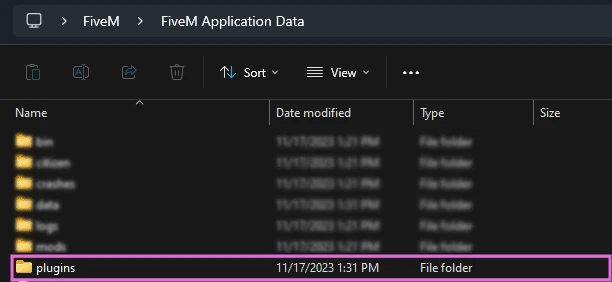
Navigate to FiveM's Plugins Folder
Open your FiveM folder and navigate to FiveM Application Data. Inside, find and open the plugins folder. This is where the ReShade files will go.

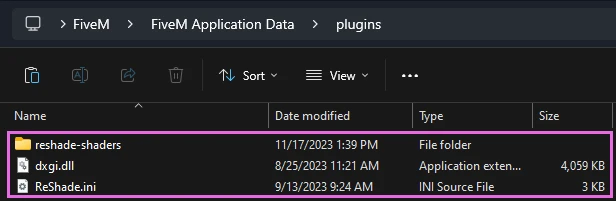
Move ReShade Files into FiveM
Go back to your GTAV folder and cut the following files and folder:
dxgi.dllReShade.iniReShade-Shaders
Paste them into the plugins folder inside your FiveM directory.
Check FiveM's Console Log
Start FiveM and press F8 to open the console log. You should see an error message related to ReShade that looks something like this:

Copy everything starting from [Addons] to the end of the message and paste it into the CitizenFX.ini file in your FiveM folder, replacing the example ID with the one from your own log.
[Addons]
ReShade5=ID:XXXXXX acknowledged that ReShade 5.x has a bug that will lead to game crashes
Make sure the ID matches your log exactly.
Restart FiveM and Enable Fix UI Lag
After saving CitizenFX.ini, restart FiveM. Go to the settings menu, enable the Fix UI Lag option, then restart FiveM one more time.
Troubleshooting
ReShade "No Effect Files" Error
If ReShade reports "No effect files found," your ReShade.ini search paths are likely missing or incorrect. Go to the Settings tab in ReShade and set the paths as follows:
| Setting | Search Path |
|---|---|
| Effect Search Path | .\ReShade-Shaders\Shaders\** |
| Texture Search Path | .\ReShade-Shaders\Textures\** |
FiveM Crash Dump Screen
If FiveM presents a crash dump screen while ReShade is installed, there is very little that can be done on your end. This type of crash is handled entirely by FiveM's own crash reporting system and is outside the scope of ReShade or any shader configuration.
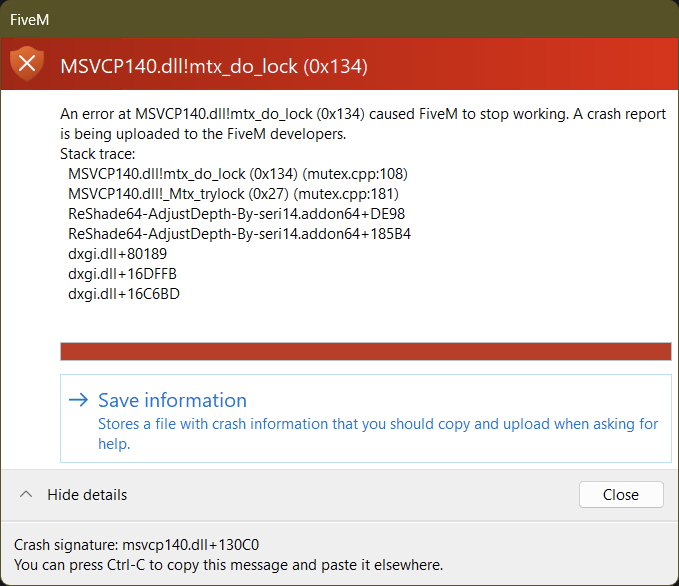
Resolving this is up to the FiveM development team. You can report the crash through FiveM's official channels, but ReShade-related crashes in FiveM have historically received little attention and are unlikely to be addressed.