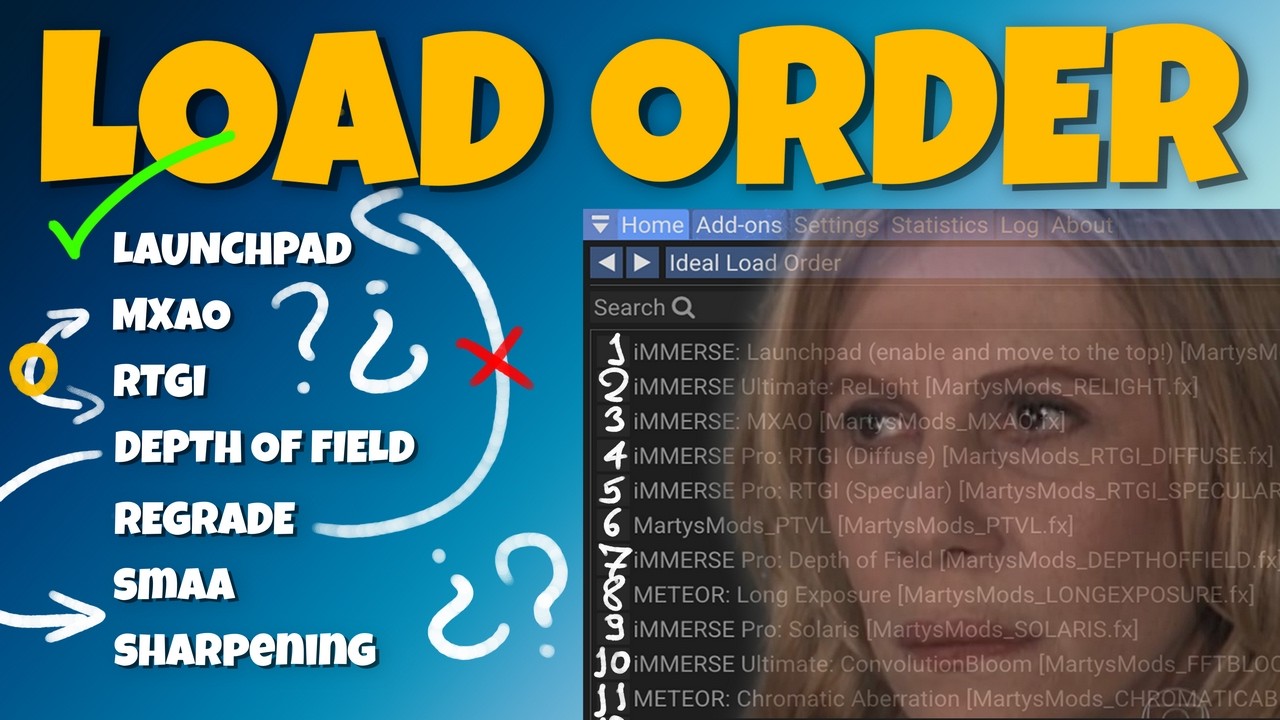
Load Order
When downloading a new ReShade preset or creating your own, the final output may not match expectations. This discrepancy is typically caused by shader load order.
ReShade applies post-processing effects sequentially, with each shader processing the output from the previous shader in the list. This ordered system determines which effects are rendered first and which are applied subsequently, directly influencing the visual result.
Managing Load Order in ReShade
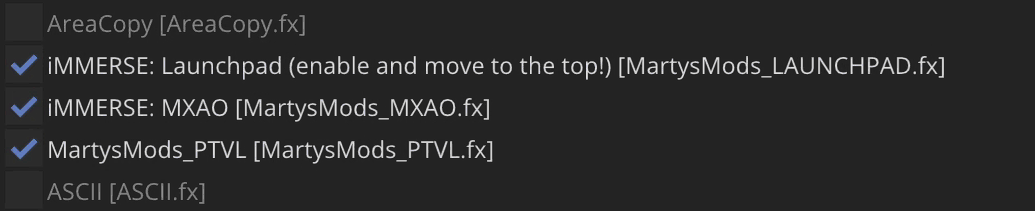
In order to change a shader's position in the load order, you can simply drag and drop shaders in the shader list within ReShade's Home tab.
Example 1: MXAO & PTVL Fog
Consider a scene where ambient occlusion is desired to add object shadowing. MXAO, an ambient occlusion shader, is enabled for this purpose. Additionally, volumetric fog is added using PTVL to enhance atmospheric depth.
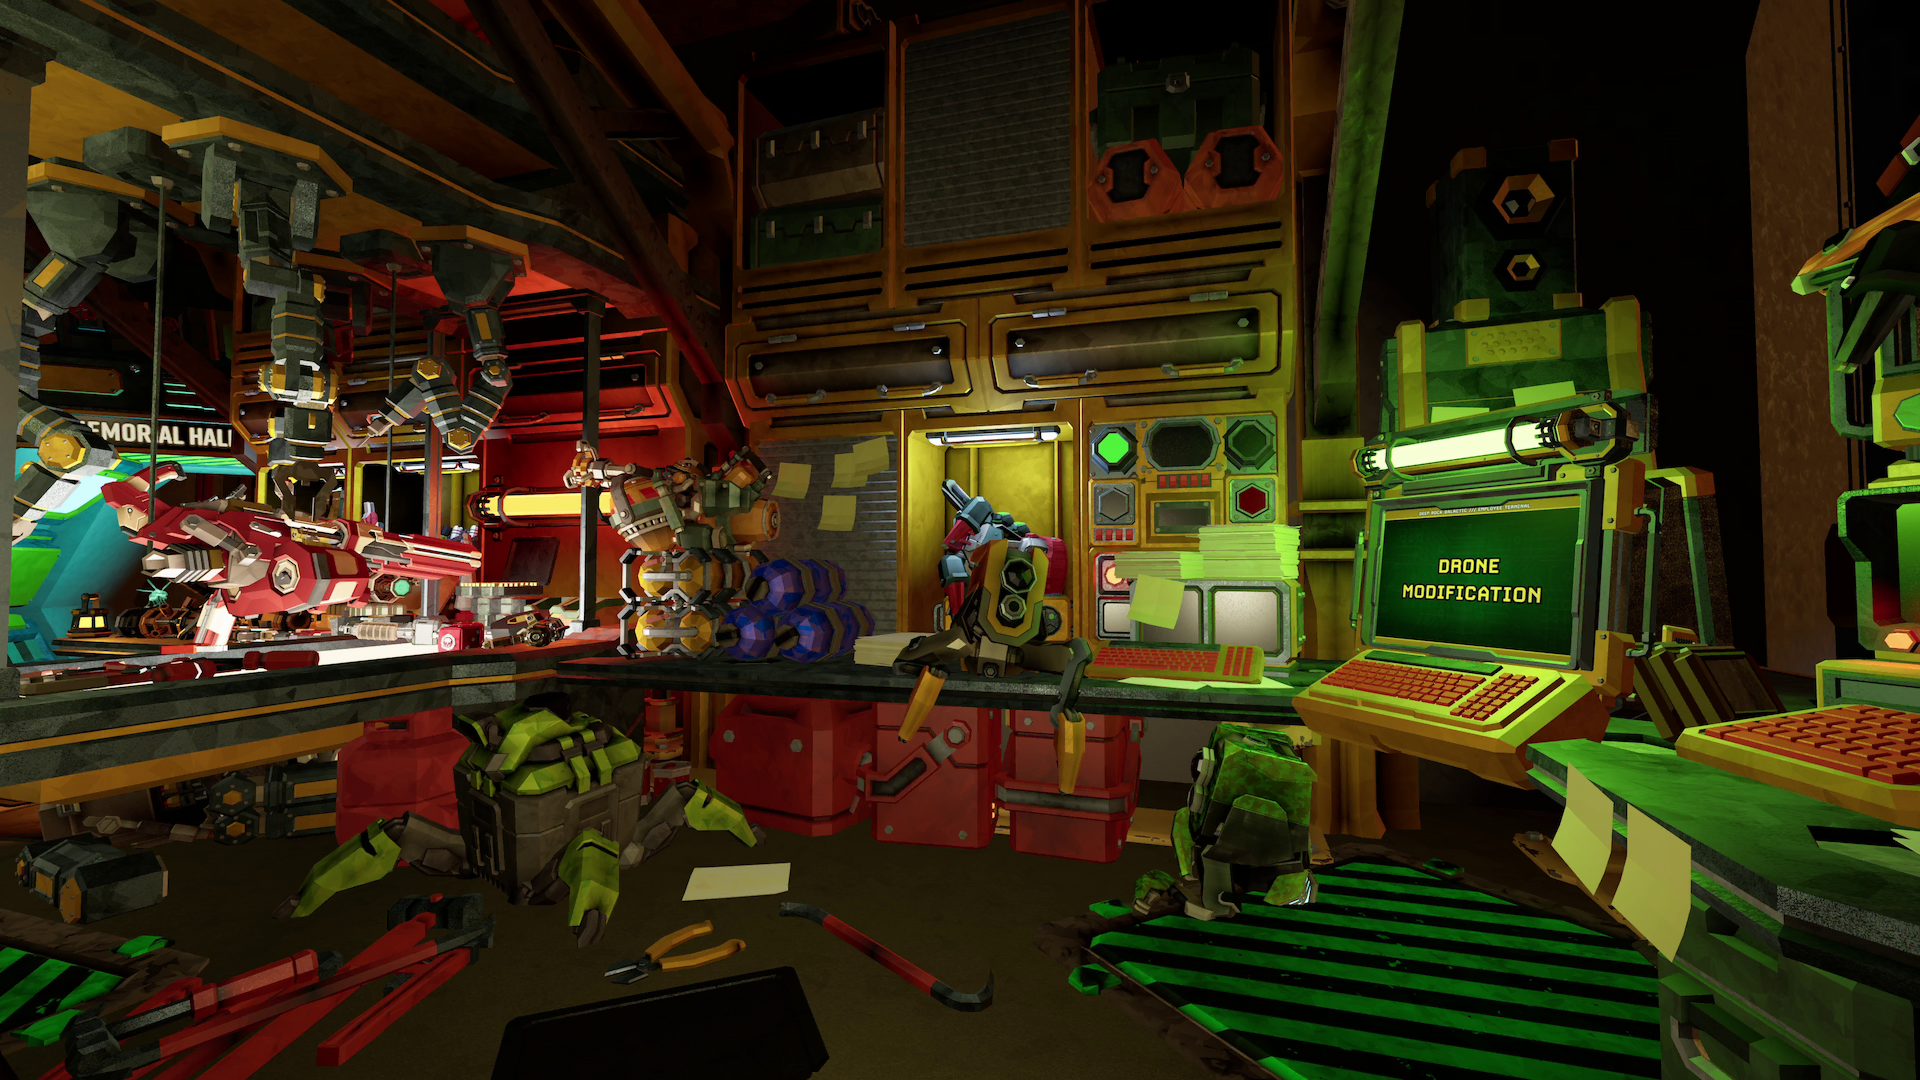
However, a visual artifact appears where object shadowing appears to bleed through the fog, creating an incorrect layering effect.
Examining the shader load order reveals PTVL positioned above MXAO, causing PTVL to render first, followed by MXAO. This order results in shadowing that should be occluded by fog instead appearing to penetrate through it.

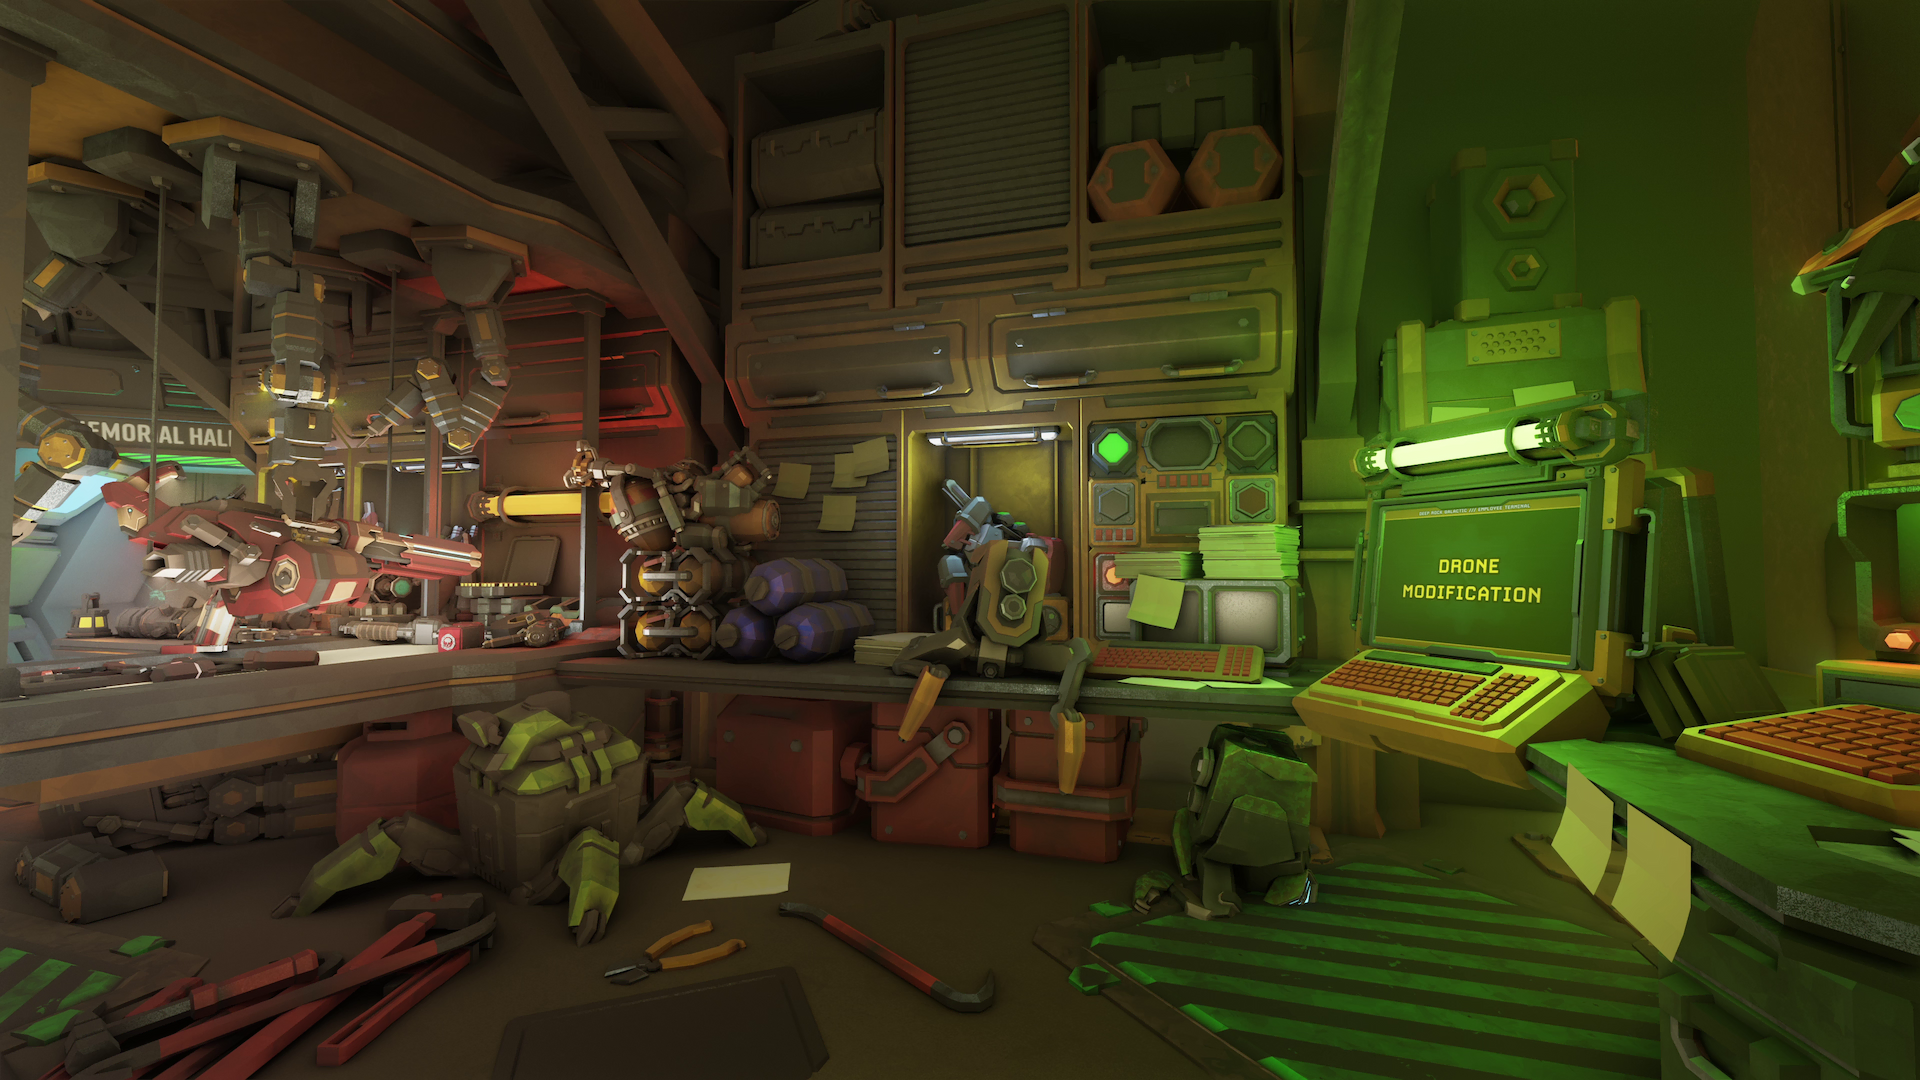
This issue is resolved by repositioning MXAO earlier in the shader load order than PTVL, ensuring MXAO processes the scene first.
With MXAO applied first and PTVL rendered subsequently, the fog correctly occludes the shadowing, producing the intended visual result.
General Rules
Load order management provides control over final output quality. While ReShade offers significant creative freedom, establishing a structured foundation with clear principles ensures optimal results.
Shader types can be organized into categories, or tiers, based on their function and dependencies within the rendering pipeline.
Each enabled shader introduces a degree of data loss through quantization and processing artifacts, which accumulates across the pipeline and degrades image quality. Therefore, minimizing the number of active shaders while achieving the look you want is recommended. Each shader should serve a distinct purpose within the load order. For example, rather than using multiple shaders to adjust contrast, a single dedicated contrast adjustment shader should be employed.
Shader Categories/Tiers
The categories that follow are organized both with what makes sense in terms of ReShade's rendering pipeline, and how traditional photography works.
Tier 1: Data Processing
This tier includes shaders that generate, process, or pass data to other effects in the pipeline. Examples include Launchpad, which processes depth buffers, normal maps, and optical flow vectors for use by subsequent shaders.
These shaders must be positioned at the top of the load order to operate on the cleanest possible input from the game's rendered frame. They must also precede any shaders that depend on their output data.
Tier 2: Depth-Based World Effects
This tier encompasses shaders that utilize the depth buffer to modify scene geometry and lighting characteristics. Examples include MXAO (ambient occlusion), RTGI (ray-traced global illumination), PTVL (volumetric fog), and ReLight (path-traced point lights).
These shaders function as world-space depth effects, directly influencing scene appearance by determining where shadows and light interact with geometry. They require access to the depth buffer and should be positioned early in the pipeline to operate on unmodified scene data.
The relative order within this tier is critical. As demonstrated in Example 1, ambient occlusion and global illumination shaders (MXAO, RTGI, ReLight) must precede volumetric effects like fog (PTVL), as volumetric effects should occlude shadowing rather than be occluded by it.
Tier 3: Camera Effects
This tier includes shaders that simulate optical and sensor characteristics of real-world camera systems. Examples include chromatic aberration, vignette, bloom, and depth of field.
These effects should be ordered to mirror their physical occurrence in a camera system. Lens-level effects, such as chromatic aberration and vignette, occur first, as they result from light passing through the lens assembly. Sensor-level effects, such as bloom, which simulates light bleeding across sensor pixels, occur subsequently, as they result from the interaction between light and the imaging sensor.
Tier 4: Color Grading
Color grading shaders, such as iMMERSE ReGrade, provide control over color, tone, and luminance characteristics through operations including levels adjustment, vibrance, exposure, and contrast modification.
Positioning color grading after camera effects ensures that grading operations are applied to the complete scene, including camera effects such as bloom and vignette, maintaining the photographic workflow where color correction occurs after optical effects have been applied.
Tier 5: Anti-Aliasing and Sharpening
Anti-aliasing and sharpening shaders should be positioned after color grading operations, as color grading can introduce aliasing artifacts, chroma subsampling errors, and additional edge artifacts that benefit from smoothing.
Within this tier, anti-aliasing must precede sharpening. Applying anti-aliasing after sharpening would blur the enhanced edges created by the sharpening process, counteracting the intended effect. Anti-aliasing should smooth existing aliasing artifacts, after which sharpening can enhance edge definition without reintroducing aliasing.
Tier 6: Composition Helpers
The final tier includes utility shaders designed to assist with image composition, such as Sceneweaver, which provides overlay guides for framing and composition.
Positioning these shaders at the bottom of the load order ensures that all visual effects have been applied before composition overlays are rendered, preventing interference between post-processing effects and composition guides.