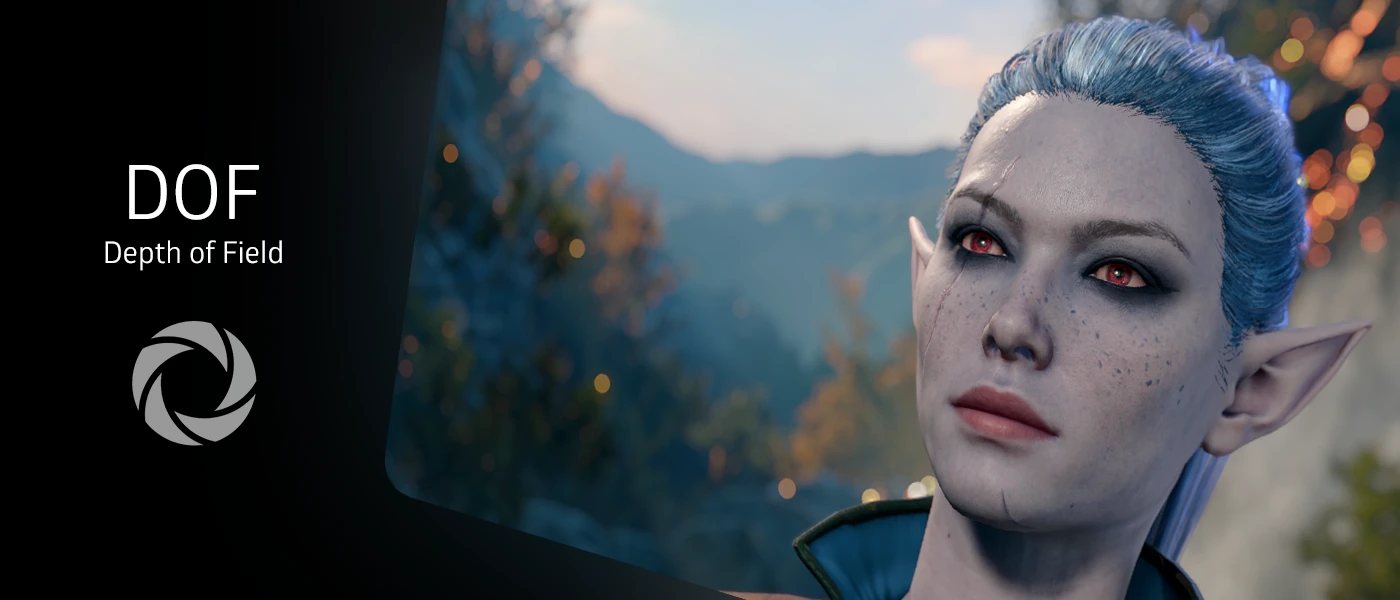
iMMERSE Pro: Depth of Field is a physically accurate depth of field shader that simulates how real camera lenses render out-of-focus areas. Rather than applying a simple screen-space blur, it models the optical behavior of a virtual camera lens using focal length, aperture f-stop, and a physically derived circle of confusion to determine how much each pixel should be blurred based on its distance from the focal plane. The result is bokeh that behaves like a real lens, with accurate aperture shapes, highlight response, and foreground-to-background blur falloff.
Focusing
Focusing Mode
Default: Autofocus.
Determines how the shader establishes the focal plane each frame.
- Manual Focus: The focal plane is set entirely by the Focal Distance slider. Nothing is detected automatically. Best for screenshots, cinematic shots, or any situation where you want complete and stable control over exactly what is in focus.
- Autofocus: The shader continuously samples a cluster of points spread around the configured Center position and adjusts the focal plane to match the closest detected surface within the Detection Range. Focus transitions smoothly at the rate set by Adjustment Speed. Best for gameplay where the subject moves and you want the focus to follow it.
- Point and Click (MMB): Clicking the middle mouse button on any point in the scene sets that point as the new focus target. The shader then locks focus to that depth until you click again. Useful when you want quick manual targeting without dragging a slider.
Manual Focus
These settings are only active when Focusing Mode is set to Manual Focus.
Focal Distance
Range: 0.002 to 1.0. Default: 0.1.
Sets the distance to the focal plane. This value is not linear: it is internally converted to actual scene depth, and the slider is weighted to be more sensitive at close distances so that nearby subjects are easier to dial in precisely. A value near 0.002 places the focal plane extremely close to the camera. A value of 1.0 pushes it out to the far end of the depth buffer, effectively at infinity. Anything in front of or behind the focal plane will be blurred proportionally to its distance from it.
Show Focus Distance
Default: Disabled.
Controls when the focus distance overlay is drawn on screen. The overlay color-codes the scene by depth zone, making it easy to see exactly which areas fall inside and outside the current focal plane.
- Disabled: The overlay is never shown.
- Enabled While Editing: The overlay appears only while you are actively dragging the Focal Distance slider, then disappears automatically. Useful for setting focus without leaving the overlay permanently on screen.
- Toggle With GUI: The overlay is visible whenever the ReShade GUI is open and hidden when it is closed.
- Enabled: The overlay is always visible regardless of whether the GUI is open.
Autofocus
These settings are only active when Focusing Mode is set to Autofocus.
Center
Range: -1.0 to 1.0 on both axes. Default: (0.0, 0.0).
Sets the center point of the autofocus sample cluster in screen space. (0.0, 0.0) places the center at the middle of the screen. Negative X values shift the cluster left, positive values shift it right. Negative Y values shift it upward, positive values shift it downward. Use this to bias the autofocus toward a subject that is not centered in the frame. Note that the visible overlay indicator represents only a subset of the actual sample points used internally.
Detection Range
Range: 0.05 to 1.0. Default: 0.35.
Controls the radius of the area around the autofocus center that is sampled to determine focus. A smaller range concentrates the detection on a tight area around the center point, which is useful for isolating a specific subject. A larger range pulls in depth information from a wider portion of the screen, which can help stabilize focus in scenes with complex geometry or when the subject moves unpredictably. If focus is hunting or jumping between subjects, increasing this value can reduce instability.
Adjustment Speed
Range: 0.0 to 1.0. Default: 0.5.
Controls how quickly the focal plane moves to match a new focus target. At 0.0, the focal plane barely moves, making focus nearly frozen. At 1.0, the focal plane snaps to the new target instantly with no transition. Values in between produce a smooth easing motion as the lens "racks" to the new depth, similar to how autofocus works on a real camera. For gameplay use, a moderate value gives natural-looking focus transitions without the focal plane lagging too far behind a moving subject.
Lens and Aperture
Foreground/Background Blur Scale
Range: 0 to 100 percent, independently for foreground and background. Default: 100 for both.
An artistic override that scales the blur radius for areas in front of or behind the focal plane independently, separate from any physically derived values. At 100, the blur in each zone matches what the focal length and f-stop would produce physically. Reducing the foreground value brings foreground elements back toward focus without affecting the background, and vice versa. This is intentionally non-physical and is meant for creative situations where the physically correct blur amount is too distracting or too subtle in a particular zone. The shader tooltip recommends relying on focal length and f-stops for primary blur control and using this only for artistic fine-tuning.
Focal Length
Range: 0.0 to 350.0 mm. Default: 90.0 mm.
Sets the focal length of the virtual camera lens in millimeters. Focal length is one of the two primary controls for depth of field magnitude. Longer focal lengths compress perspective and produce a narrower, shallower depth of field with more blur on out-of-focus areas. Shorter focal lengths produce a wider angle of view and a deeper depth of field with less blur. In photography terms, 90mm is roughly equivalent to a short telephoto or portrait lens, which explains the default: it produces a natural-looking depth of field for close subjects while keeping background blur visible. For wider scenes or environments where you want most of the scene to remain sharp, lower values around 24-50mm are more appropriate.
Aperture F-Stops
Range: f/0.95 to f/8.0. Default: f/2.8.
Sets the aperture size of the virtual lens. The f-stop is the second primary control for depth of field magnitude, and it also directly shapes the bokeh disc. Lower f-numbers represent a wider aperture opening, which lets more light in and produces a shallower depth of field with larger, more pronounced bokeh discs. Higher f-numbers represent a narrower opening, producing a deeper depth of field and smaller, more subtle bokeh. The relationship between f-stop and bokeh size is direct: halving the f-stop value roughly doubles the diameter of out-of-focus bokeh. f/2.8 is a common portrait lens aperture that produces visible but not extreme bokeh. For very prominent bokeh, values around f/1.4 to f/2.0 are typical. For scenes where background separation should be subtle, values of f/5.6 or higher flatten the effect considerably.
Aperture Shape
Range: 3 to 12 Blades. Default: 6.
Controls the number of blades in the virtual aperture diaphragm. In real lenses, the aperture is formed by a set of overlapping blades arranged in a ring, and the number of blades determines the shape of out-of-focus highlights. With 6 blades, bokeh discs have a hexagonal shape, characteristic of many mid-range camera lenses. With 3 blades, they are triangular. Higher blade counts produce increasingly circular bokeh, approaching the look of a perfectly round aperture. Most professional cinema lenses use between 9 and 11 blades for near-circular bokeh. The polygonal shape is most visible on bright point light sources blurred in the background. At high values of Aperture Roundness, the blade count has less visual impact since the polygon is already being rounded toward a circle.
Aperture Roundness
Range: 0.0 to 1.0. Default: 1.0.
Blends the aperture shape between the polygon defined by Aperture Shape and a perfect circle. At 0.0, the bokeh discs have sharply defined polygonal edges matching the blade count exactly. At 1.0, the edges are fully rounded into a circle regardless of blade count. Intermediate values produce the characteristic cat-eye or petal-like rounding seen on lenses with few blades but smooth aperture mechanisms. The default of 1.0 produces circular bokeh out of the box; lower this value if you want the geometric polygon shape to be visible.
Aperture Rotation
Range: 0.0 to 1.0. Default: 0.25.
Rotates the aperture polygon shape. The value is normalized, where 0.0 and 1.0 represent the same angle after a full rotation. This only affects the orientation of the polygon shape and has no visual effect when Aperture Roundness is set to 1.0 since a circle has no rotational orientation. Use this to orient hexagonal or other polygonal bokeh in a specific direction if the default angle is not desirable.
The Lens and Aperture - Advanced category containing Tangential Bokeh Scale, Sagittal Bokeh Scale, and Anamorphic Bokeh Ratio is currently disabled in this version of the shader and will not appear in the ReShade UI. These controls simulated optical aberrations such as astigmatism and anamorphic lens squeeze. They may return in a future update.
Blur
Quality
Range: 5 to 25 Rings. Default: 7.
Controls the number of concentric sample rings used to render each bokeh disc. Each ring adds a layer of samples distributed around the disc, increasing the density and smoothness of the blur kernel. At low values, bokeh discs may appear as visible rings or show sample gaps, particularly on large out-of-focus highlights. At higher values, the disc fills in smoothly and cleanly. The performance cost scales with this value since more rings means more texture samples per pixel. For real-time use, values between 7 and 12 are a good range. For screenshots, pushing to 15 or higher produces very clean results. The default of 7 is a practical balance for most hardware.
Smoothness
Range: 0.0 to 1.0. Default: 0.5.
Applies an additional smoothing pass to out-of-focus areas on top of the primary bokeh blur. This helps close any remaining gaps between sample rings and softens the edges of bokeh discs that may still look slightly structured at lower Quality settings. Higher values produce softer, more painterly bokeh at the cost of some disc definition. Lower values preserve the structured appearance of the disc more faithfully. This setting is most noticeable on large, strongly blurred areas.
Highlight Intensity
Range: 0.0 to 1.0. Default: 0.9.
Controls how prominently bright areas of the scene form visible bokeh discs when out of focus. In real photography, a bright point light source blurred through a lens forms a bright disc shaped by the aperture. This parameter governs how much that effect is emphasized. At higher values, bright highlights bloom into well-defined discs with visible shape and edge contrast. At lower values, the discs are dimmer and blend more uniformly into the surrounding blur. Setting this too high on a scene with many bright lights can produce very prominent, potentially distracting bokeh. Setting it too low flattens the depth of field and loses the characteristic look of lens blur.
Highlight Gamma
Range: 0.0 to 1.0. Default: 1.0.
Adjusts the tone curve applied to bokeh highlights before they are rendered as discs. Higher values push the highlights to be brighter and more contrasty, making the discs stand out more sharply from the surrounding blur. Lower values pull the highlights down, producing softer discs that fade more gradually into the blurred background. This works alongside Highlight Intensity: Intensity controls the overall strength of the highlight response and Gamma controls the distribution of brightness within that response. At default values, highlights are rendered with a neutral gamma curve.
Color Intensity
Range: 0.0 to 1.0. Default: 1.0.
Controls how saturated the color of bokeh discs is. When a colored light source such as a red lamp or blue neon sign is blurred out of focus, the resulting disc inherits that color. This parameter scales how strongly that color is preserved or amplified in the disc. At 1.0, the disc retains the full color of the source. At 0.0, discs are rendered in a more neutral, desaturated manner. Values above the midpoint can push disc colors beyond the original source saturation, which may look vivid but can oversaturate in scenes with already highly saturated lights.
Sprite Density
Range: 0.0 to 1.0. Default: 0.5.
Controls how many bokeh discs are replaced with procedural sprite-based representations instead of being rendered through the standard ring-sampling method. The sprite approach substitutes the more expensive sampled disc with a lightweight procedural shape that preserves the visual appearance of the bokeh disc. At 0.0, all bokeh is rendered through the standard sampler with no sprite substitution. At 1.0, as many discs as possible are replaced with sprites, which reduces GPU cost for scenes with large numbers of out-of-focus highlights but may show subtle visual differences compared to purely sampled bokeh. The practical sweet spot for most scenes is somewhere in the middle, where sprites handle the smaller or more numerous discs and the full sampler handles the most prominent ones.
Enable Undersampling Protection is currently disabled in this version of the shader and will not appear in the ReShade UI. This option would have added extra samples in areas where the standard ring count was insufficient to fully fill a large bokeh disc without visible gaps.
Variable Shading Rate
Variable Rate Shading (VRS) is a technique that reduces the pixel shading cost in areas of the image where fine detail is not visible. In the context of depth of field, heavily blurred regions contain no recoverable detail regardless of how densely they are shaded. VRS takes advantage of this by shading those regions at a reduced rate, spending GPU budget where it actually matters.
VRS Strength
Range: 0.0 to 1.0. Default: 0.5.
Controls how aggressively the shader reduces the shading rate in blurred areas. At 0.0, VRS has no effect and every pixel is shaded at full rate. At 1.0, the shading rate is reduced as much as possible in areas with large circle of confusion values, producing the greatest performance savings. Higher values may introduce subtle artifacts at shading rate boundaries in some scenes, particularly where the depth of field transitions sharply. If you notice a blocky or stepped pattern appearing at blur edges, reducing this value will minimize it.
VRS Debug
Range: 0.0 to 1.0. Default: 0.0.
Overlays a color-coded visualization on the image showing which shading rate is being applieds. This is a diagnostic tool for understanding how VRS is distributing shading work across the frame. Raising this value toward 1.0 makes the visualization more opaque and visible. The color coding is as follows:
Debug / Other
Focus Debug Color Scheme
Default: Electric Sunset.
Selects the color palette used by the focus distance overlay when Show Focus Distance is set to any visible mode. The overlay color-codes the scene into depth zones to show what is in focus, in the foreground, and in the background. This setting does not affect rendering quality and is purely a preference for overlay readability.
- Default: Standard color scheme for the depth zone overlay.
- Accessible: An alternative palette designed with color vision deficiencies in mind, using colors that remain distinguishable for users with common forms of color blindness.
- Electric Sunset: A high-contrast palette with vivid colors that tends to be easier to read across a wider variety of scene content.
Bokeh Shape Helper, which would have displayed a point grid for diagnosing bokeh shape and rotation, is currently disabled in this version of the shader and will not appear in the ReShade UI.