Opening Windows File Permissions
Sometimes games install to folders that Windows protects from modification. This can prevent ReShade from reading or writing files it needs to work correctly. This guide shows you how to configure file system permissions to allow ReShade to access the required folders and files.
Find the Game Directory
First, locate the game folder. Follow the guide for finding your game directory to determine where the game is installed.
After locating the game folder, navigate to the parent directory (the folder that contains the game folder). For example, if the game is in C:\Games\MyGame, navigate to the C:\Games folder.
Open Folder Properties
-
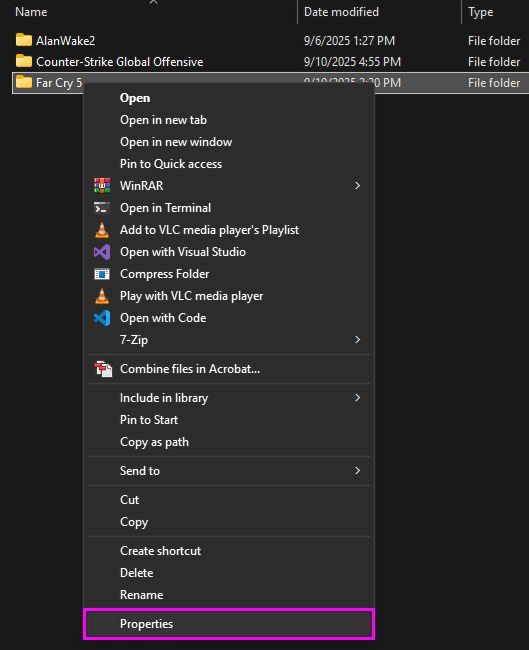
Right-click the game folder and click Properties in the context menu
-
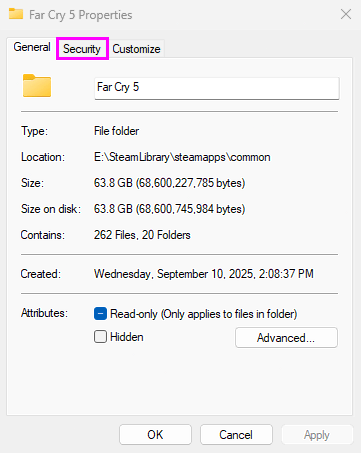
Click the Security tab at the top
-
Click the Advanced button in the bottom right corner
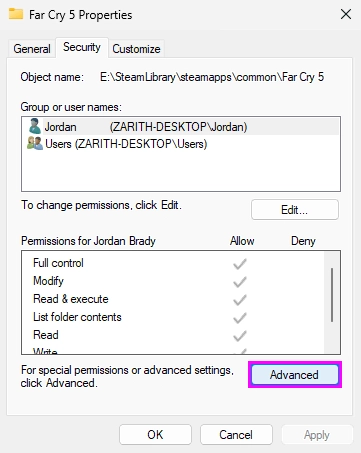
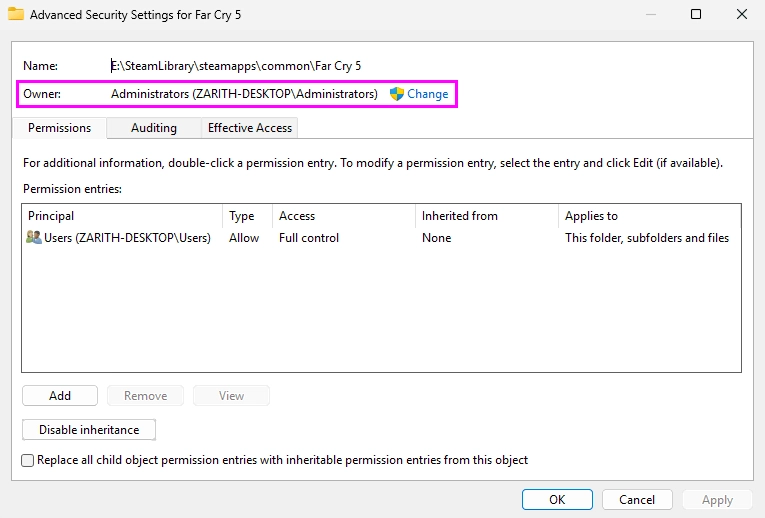
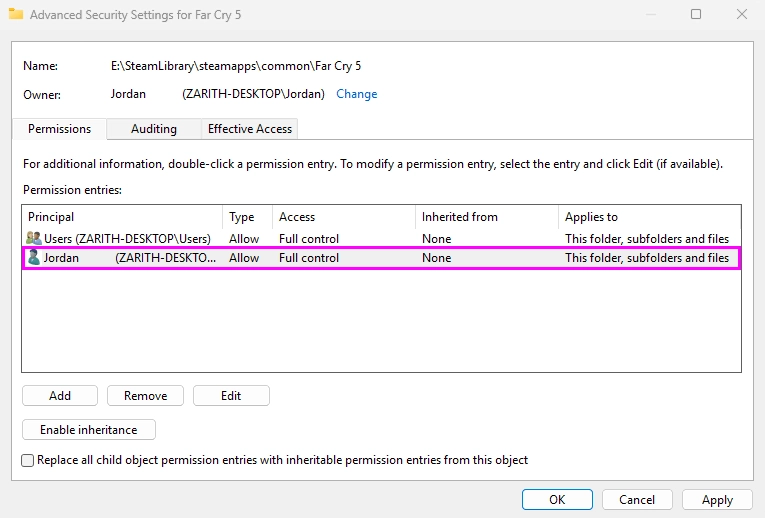
The Advanced Security Settings window opens. All subsequent permission changes are performed in this window.
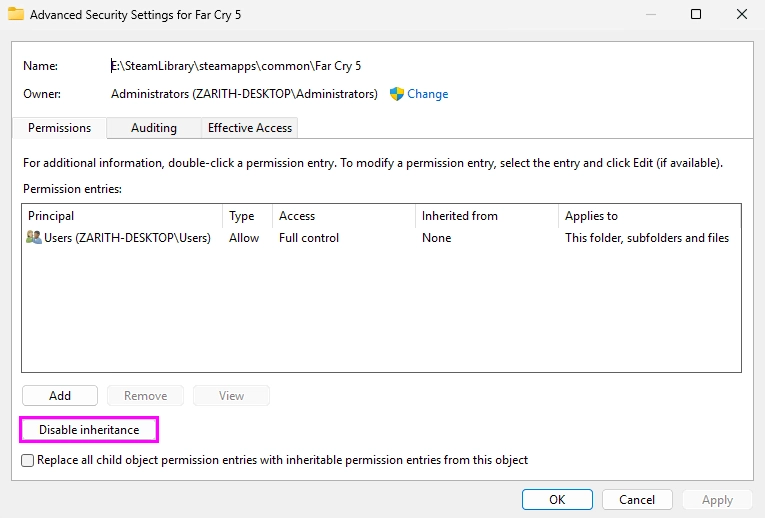
Disable Permission Inheritance
Windows normally inherits permissions from parent folders, which can sometimes cause issues in protected locations. Disable inheritance to define explicit permissions for the game folder.
-
In the Advanced Security Settings window, click Disable inheritance at the bottom left
-
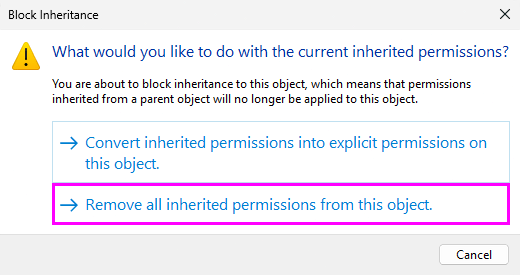
In the prompt that appears with the question What would you like to do with current inherited permissions?, click Remove all inherited permissions from this object
-
Click Apply
This removes existing inherited permission entries so that explicit permissions can be configured for the folder.
Set Folder Ownership
Set the current user account as the owner of the folder to enable permission management.
-
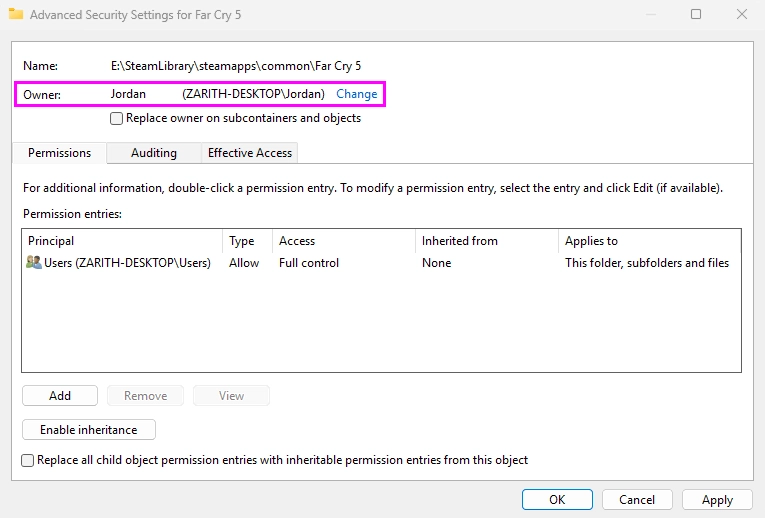
At the top of the Advanced Security Settings window, locate Owner: and click the blue Change link next to it (this entry usually has a shield icon)
-
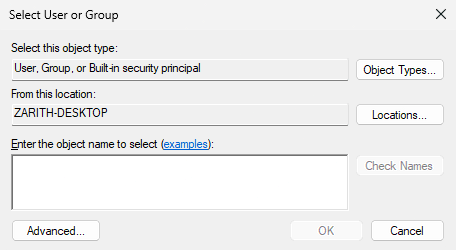
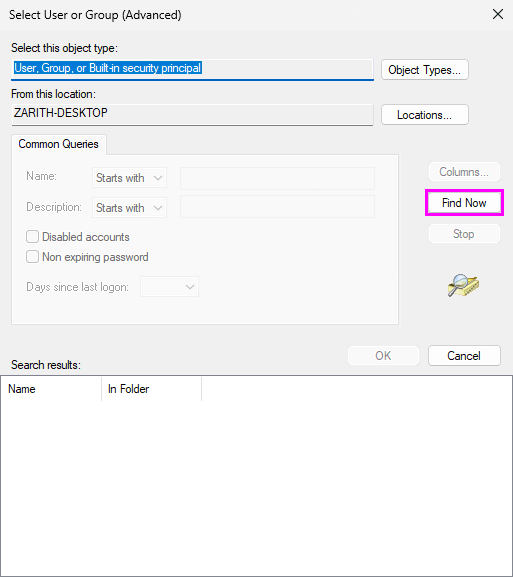
A Select User or Group window will appear
-
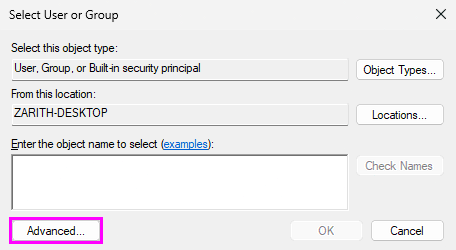
Click Advanced... at the bottom left
-
In the new window, click Find Now on the right side to search for all users on your computer
-
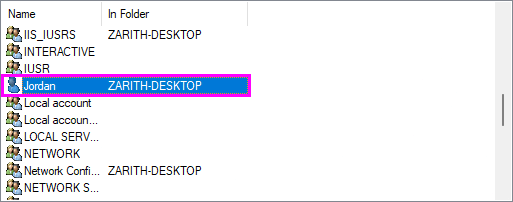
Scroll through the list at the bottom until the current user name is found (it has a single-person icon next to it)
-
Double-click the user name to select it
-
Click OK to close the user selection window
-
Click OK again to close the Select User or Group window
The Owner field now shows the selected user account.
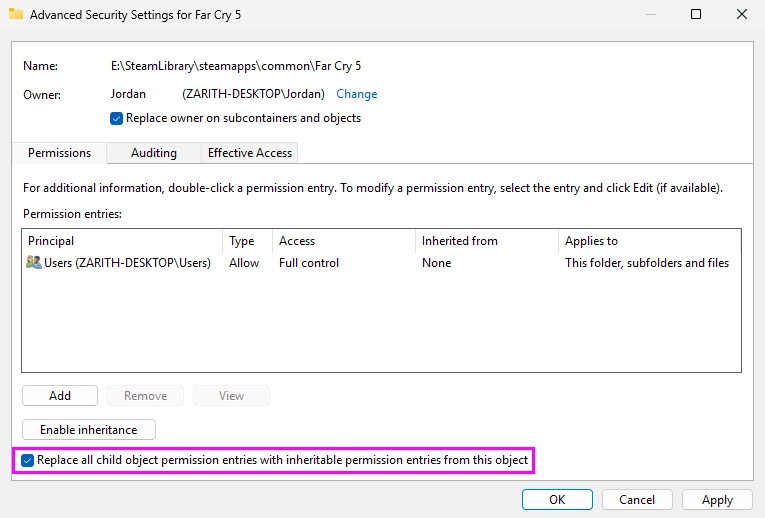
Apply Ownership to Subfolders and Files
Apply the new ownership to the folder and all contained subfolders and files.
-
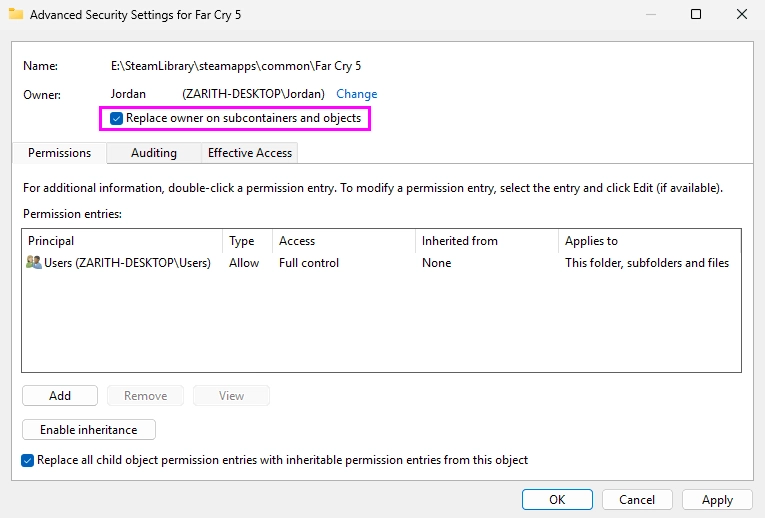
Check the box labeled Replace owner on subcontainers and objects
-
Check the box labeled Replace all child object permission entries with inheritable permission entries from this object
-
Click Apply at the bottom right
-
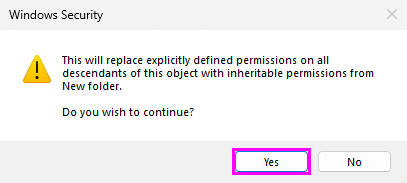
If Windows displays the prompt Do you want to replace all explicitly defined permissions on all child objects with inheritable permissions from this object?, click Yes
Windows may take some time to apply ownership changes to all files and folders.
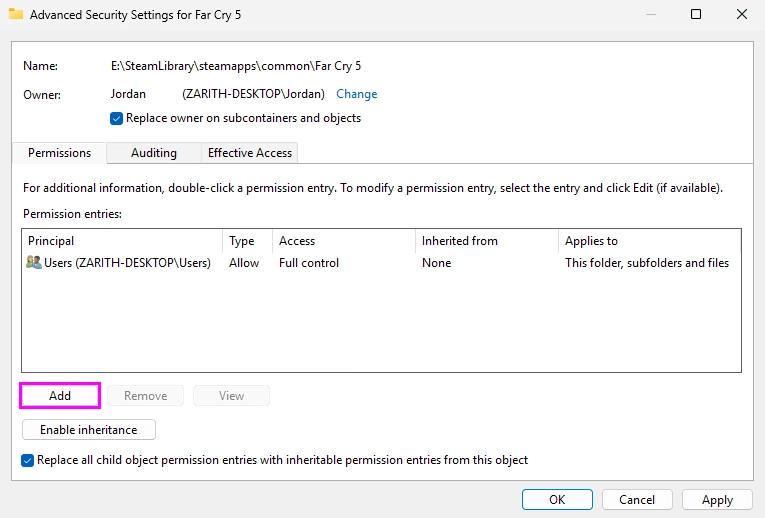
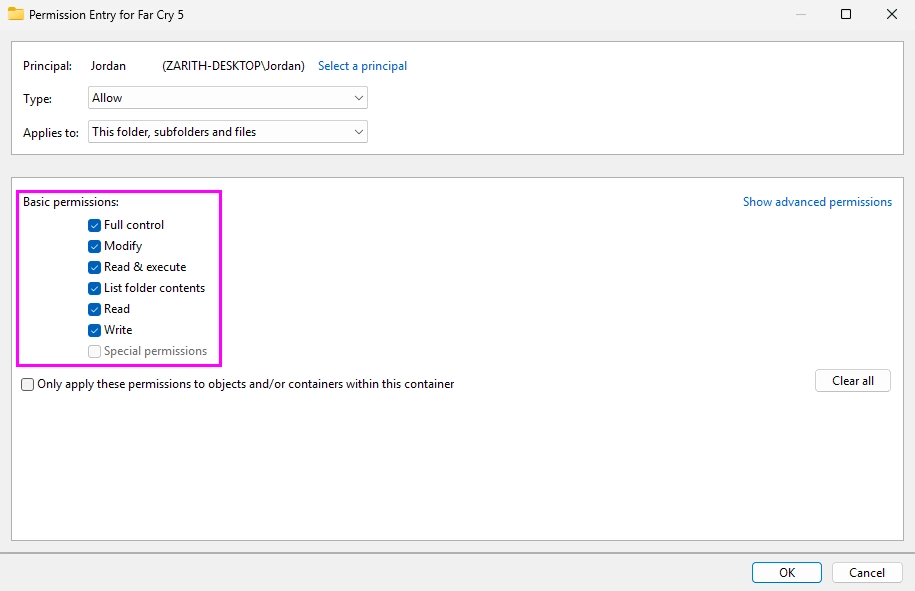
Grant Full Control to the User
Grant the current user account permission to read, write, and modify all items in the folder.
-
In the Advanced Security Settings window, click Add at the bottom left
-
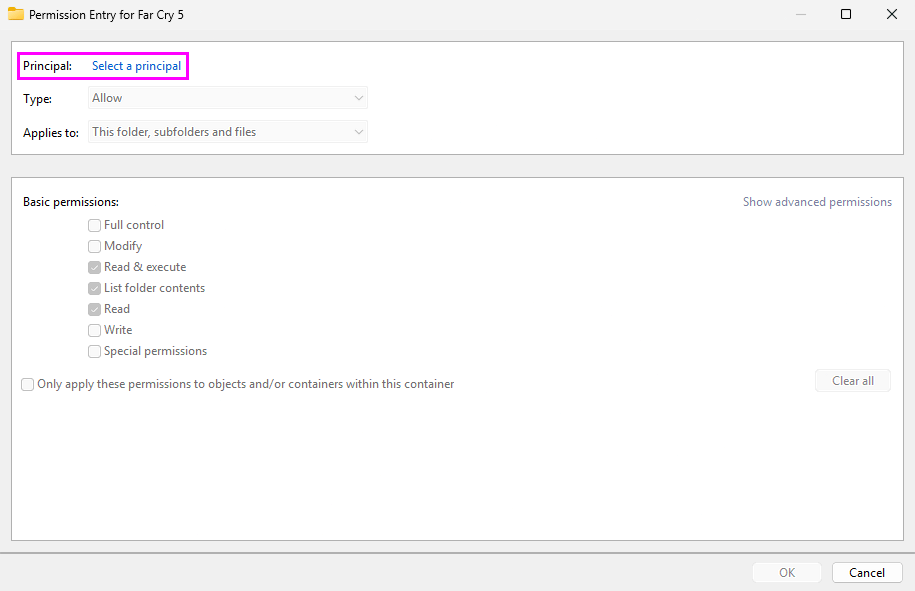
A Permission Entry window will open
-
Click the blue Select a principal link
-
Repeat the same user selection process:
-
Click Advanced...
-
Click Find Now
-
Locate and double-click the current user name
-
-
Back in the Permission Entry window, verify the following:
-
Type: Allow
-
Applies to: This folder, subfolders, and files

-
-
Check the Full Control box (this automatically selects all other permissions)
-
Click OK
The current user account now appears in the permissions list with Full Control.
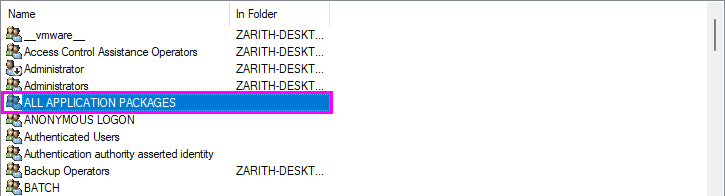
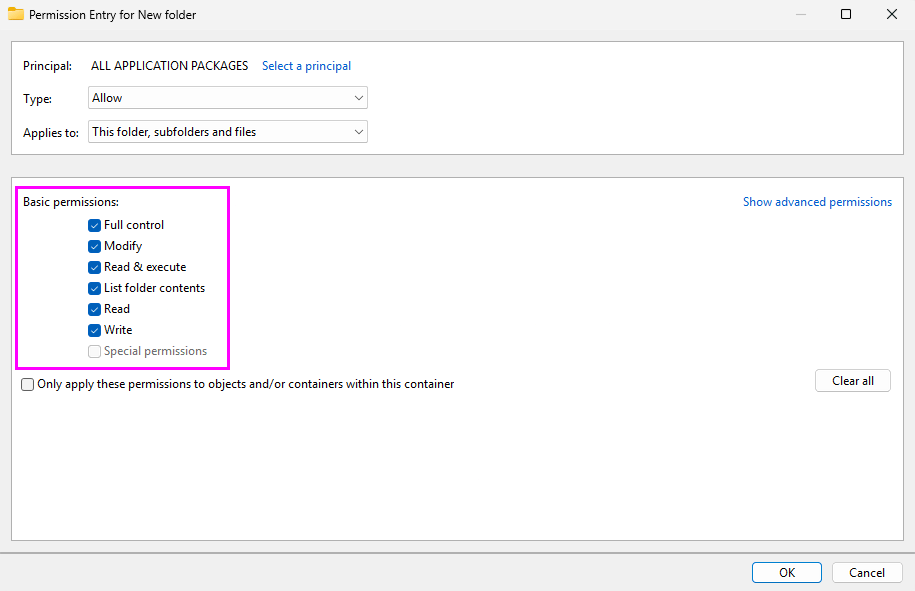
Grant Full Control to Applications
Grant the ALL APPLICATION PACKAGES group access so that applications, including ReShade, can read and write to the folder.
-
Click Add again in the Advanced Security Settings window
-
Click Select a principal in the new Permission Entry window
-
Click Advanced...
-
Click Find Now
-
Locate ALL APPLICATION PACKAGES in the list (this entry may be near the top) and double-click it.
-
Verify the following settings:
-
Type: Allow
-
Applies to: This folder, subfolders, and files

-
-
Check Full Control
-
Click OK
Apply All Changes
- Click Apply in the Advanced Security Settings window
- Click OK to close the window
- Click OK again to close the Properties window
The game folder is now configured with explicit permissions that allow ReShade and other applications to read and write the required files.