Using ReShade with a Rendering API Wrapper
Rendering API wrappers bridge different versions of rendering APIs, allowing older APIs (e.g., DirectX 9) to convert to modern ones like Vulkan. This can enhance ReShade shader compatibility or improve performance in older games.
DXVK: Wrapping DirectX to Vulkan
DXVK transforms DirectX games to run on the Vulkan API, useful for adapting older DirectX 9 games to benefit from newer compute shaders incompatible with DX9.
Installing DXVK
Download DXVK
Download the latest DXVK version from their GitHub releases.
Find your game’s directory
If needed, use our guide to locate your game’s executable.
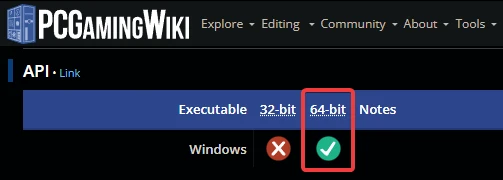
Find your game’s architecture and API
Refer to PCGamingWiki to determine your game’s rendering API and architecture.

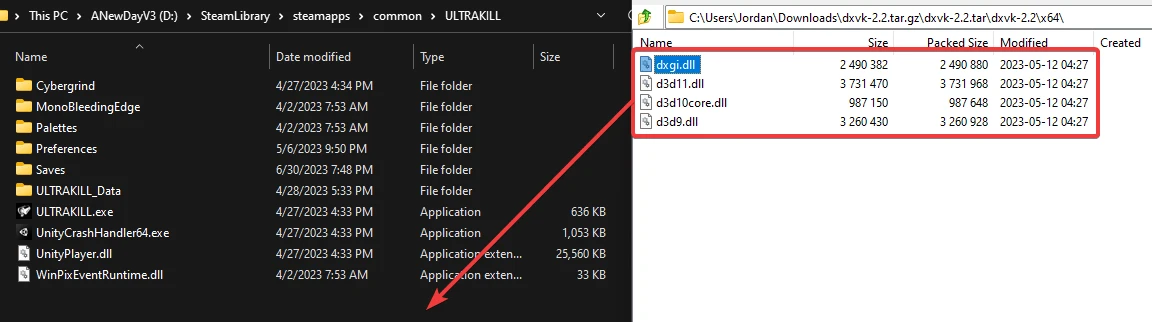
Extract DXVK’s files
Unzip the DXVK archive (e.g., dxvk-2.2.tar.gz) using 7zip. Inside, you’ll find x64 and x32 directories. Navigate to the appropriate folder based on your game’s architecture.

Choose the relevant DXVK DLL file for your game’s rendering API
Inside the chosen architecture directory, you’ll find files corresponding to different rendering APIs:
| File Name | DirectX Version |
|---|---|
| dxgi.dll | DirectX 11 and 12 |
| d3d11.dll | DirectX 11 |
| d3d10core.dll | DirectX 10 |
| d3d9.dll | DirectX 9 |
Transfer the DLL to your game’s root directory
Place the chosen DLL in the same location as the game’s executable.
Reinstall ReShade and test
Install ReShade for your game using the Vulkan API and test it. If ReShade doesn’t display after installation, you might have selected the wrong application or used the incorrect architecture/DLL.
dgVoodoo 2: Wrapping 3DFX Glide and Direct3D / DirectX (1 to 9) to DirectX12
dgVoodoo2 enhances older games by wrapping outdated renderers from 3DFX and Direct3D (versions 1 to 9) to modern DirectX equivalents, unlocking modern DirectX features and improving compatibility with modern operating systems.
Installing dgVoodoo 2 for 3DFX Glide
Download dgVoodoo2
Download the latest version of dgVoodoo2 from dege’s website.
Extract the downloaded files
Extract the files to a location with write permissions, like the “Documents” folder or the “Desktop.”
Locate your game directory
If needed, use our guide to locate your game’s executable.
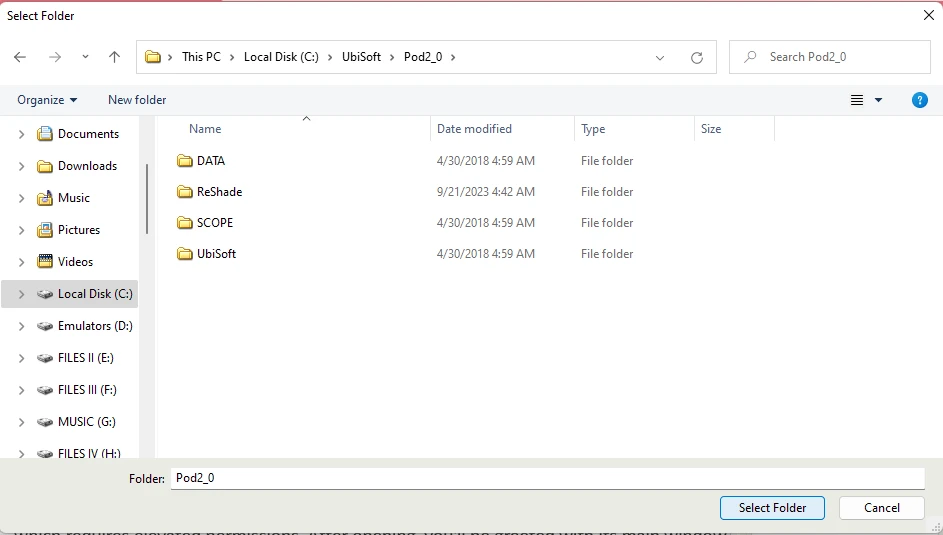
Locate the game directory within dgVoodoo2
Run dgVoodoo2 as Administrator. Click “Add” and navigate to your game’s directory.
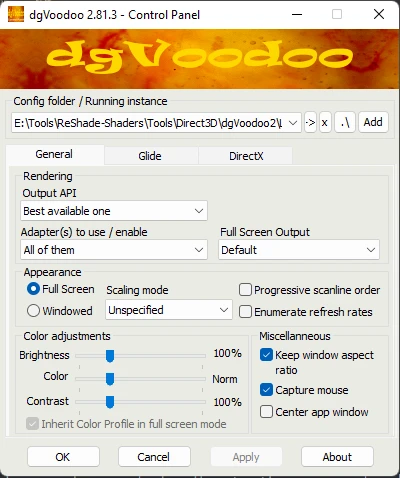
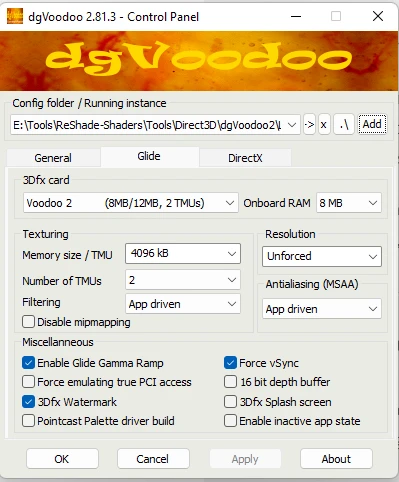
Configure the game
Click on the “Glide” tab. Adjust the settings as needed:
- 3Dfx card: Specifies the GPU functions and specs dgVoodoo2 will simulate.
- Onboard RAM: Defines how much RAM your “GPU” has (8MB or 16MB).
- Texturing: Adjust Memory Size and Texturing options.
- 3Dfx Watermark: Enable or disable the watermark.
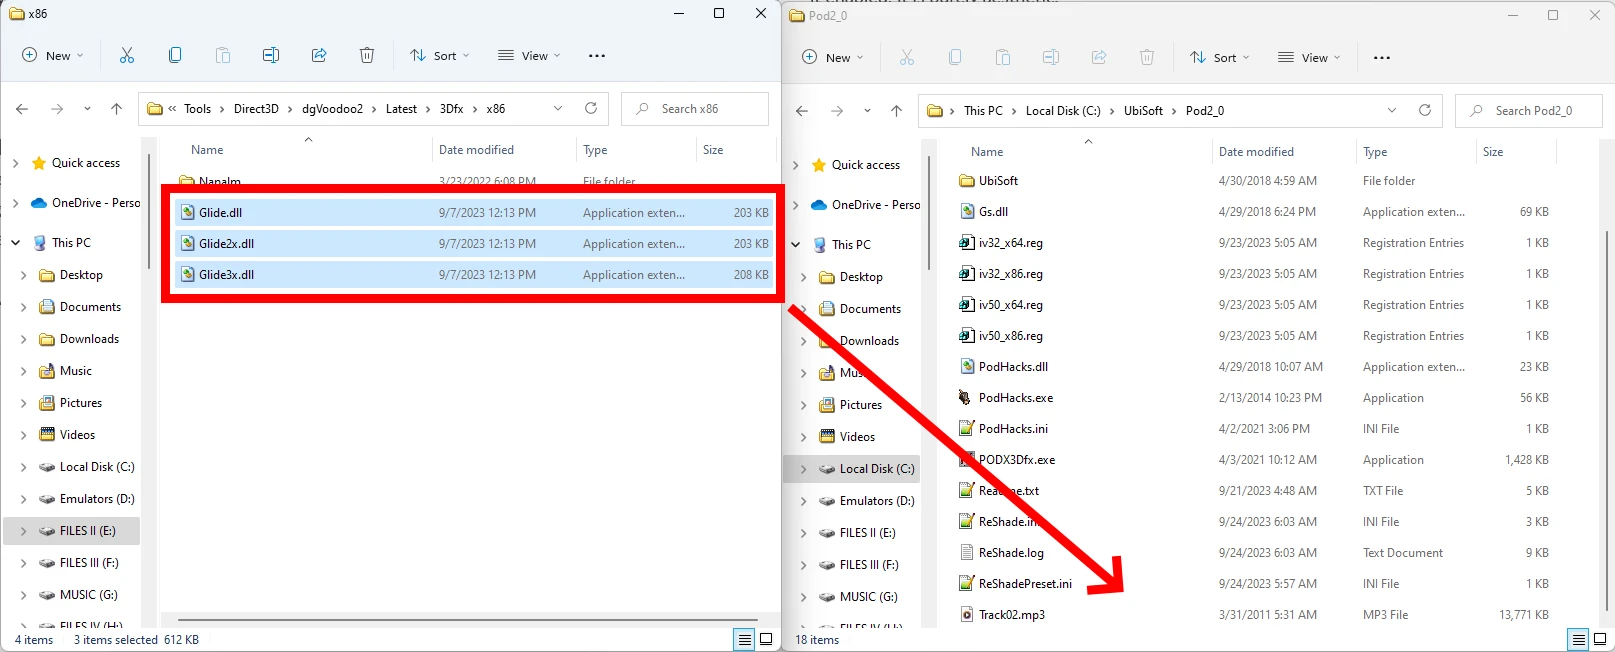
Finishing dgVoodoo2 installation
Copy the necessary DLL files from the dgVoodoo2 directory to your game’s directory. Run the game to complete the installation.
Installing dgVoodoo 2 for DirectX
Download dgVoodoo2
Download the latest version of dgVoodoo2 from dege’s website.
Extract the downloaded files
Extract the files to a location with write permissions, like the “Documents” folder or the “Desktop.”
Locate your game directory
If needed, use our guide to locate your game’s executable.
Locate the game directory within dgVoodoo2
Run dgVoodoo2 as Administrator. Click “Add” and navigate to your game’s directory.
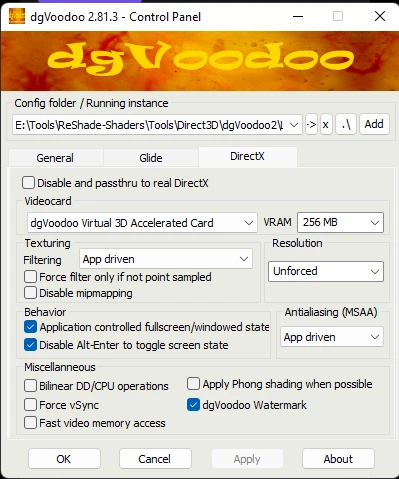
Configure the game
Click on the “DirectX” tab. Adjust the settings as needed:
- Videocard: The card that dgVoodoo2 will emulate. Set it to the maximum VRAM available.
- dgVoodoo watermark: Disable this checkbox to remove the watermark on the screen.
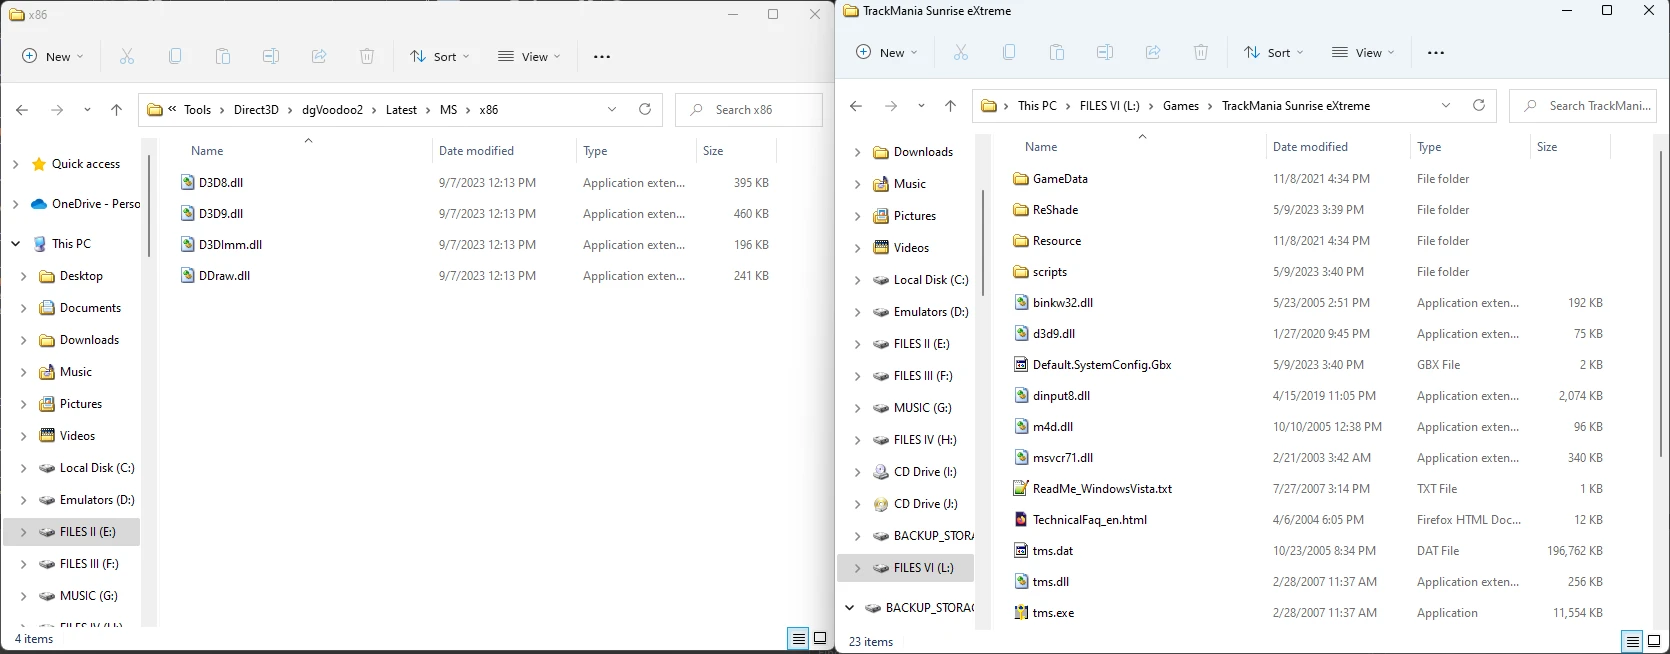
Finishing the dgVoodoo2 installation
Copy the necessary DLL files from the dgVoodoo2 directory to your game’s directory. Run the game to complete the installation.
| DLL Files | DirectX Version |
|---|---|
| D3D9.dll | DirectX 9 |
| D3D8.dll | DirectX 8 |
| D3DImm.dll, DDraw.dll | Direct3D 1 to 7 |
If unsure about which DLL to use, check PCGamingWiki for your game’s details.
Wine D3D: Wrapping Direct3D/DirectX to Vulkan or OpenGL
If DXVK doesn’t work or is unsuitable for a legacy system, Wine’s DirectX wrapper might help. Older versions can wrap to OpenGL instead of Vulkan, which may be better for older GPUs or retro games. Installation is similar to DXVK and other wrappers.
Installing WineD3D as Vulkan
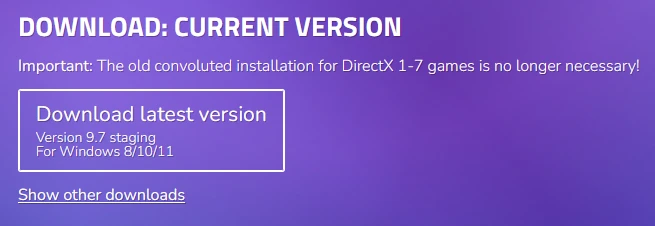
Downloading WineD3D for Vulkan
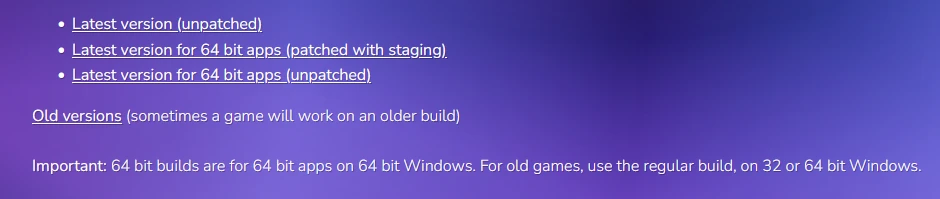
Download WineD3D from Federico Dossena’s Website. Click the “Download Latest” button. For x64 games, select “Latest version for 64-bit apps (patched with staging).”
Installing WineD3D into the game
Identify the DirectX version of your game using PCGamingWiki and then grab the required DLLs:
| DLL Files | DirectX Version |
|---|---|
| dxgi.dll | DirectX 12 |
| d3d11.dll, dxgi.dll | DirectX 11 |
| d3d10.dll, d3d10_1.dll, d3d10core.dll, dxgi.dll | DirectX 10/10.1 |
| D3D9.dll | DirectX 9 |
| D3D8.dll | DirectX 8 |
| D3DImm.dll, DDraw.dll | Direct3D 1 to 7 |
Additionally, copy wined3d.dll. Then, install ReShade as a Vulkan application.
Installing WineD3D as OpenGL
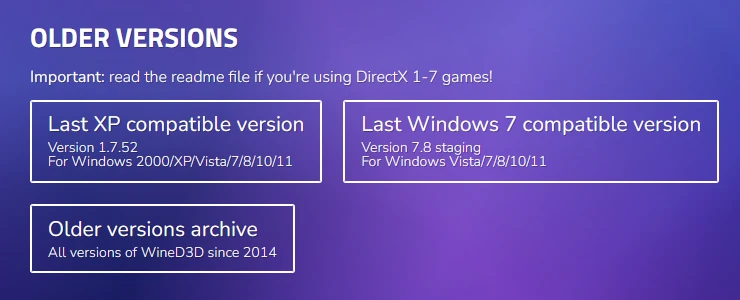
Downloading WineD3D for OpenGL
Download WineD3D from Federico Dossena’s Website. Click the button for the “Last Windows 7 Compatible version.”
Installing WineD3D into the game
Identify the DirectX version of the game using PCGamingWiki and then grab the required DLLs:
| DLL Files | DirectX Version |
|---|---|
| dxgi.dll | DirectX 12 |
| d3d11.dll, dxgi.dll | DirectX 11 |
| d3d10.dll, d3d10_1.dll, d3d10core.dll, dxgi.dll | DirectX 10/10.1 |
| D3D9.dll | DirectX 9 |
| D3D8.dll | DirectX 8 |
| D3DImm.dll, DDraw.dll | Direct3D 1 to 7 |
Also, copy wined3d.dll. Then, install ReShade into the game as an OpenGL application.