iMMERSE Ultimate: ReGrade +
ReGrade + is a commercial-level color-correction suite for ReShade, inspired by industry-standard tools. It eliminates the need to leave the game for detailed adjustments, allowing real-time color correction with an intuitive UI. This makes it a seamless experience for users, especially those knowledgeable in Color Theory, Photography, and Image Post-Processing.
Enabling ReGrade +
Before adjusting parameters, move the “ReGrade +” tab to a separate window in the ReShade/Game UI. This controls the entire shader and lets you tweak other effects while viewing the results in real-time. Enabling the shader alone won’t activate it. If any component is not running, the Addon/Shader Window will indicate it, like so:

Scopes
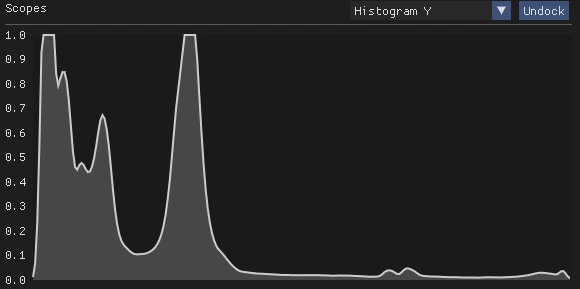
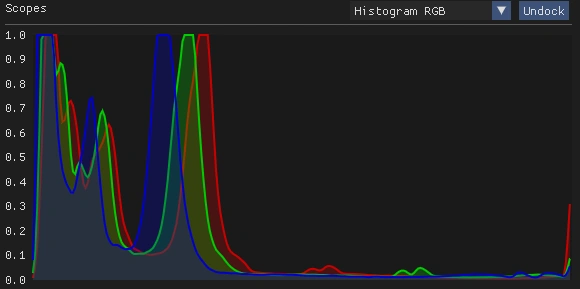
The “Scopes” section provides graphical representations of various color statistics and balances. By default, it shows the “Histogram RGB,” which displays exposure and color values of the current scene. You can select different options from the drop-down box:
-
Histogram Y: Displays the luminance levels of the image.
-
Histogram RGB: Shows the color levels of the image.
-
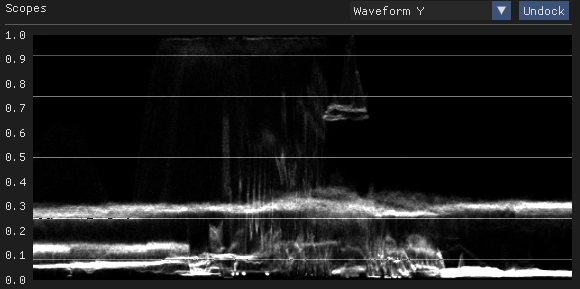
Waveform Y: Visualizes the luminance levels in a waveform/spectral format.
-
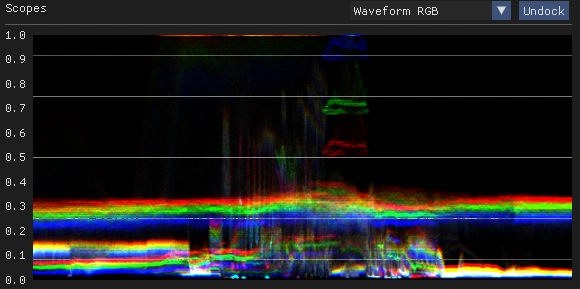
Waveform RGB: Visualizes the color levels in the same waveform/spectral format.
-
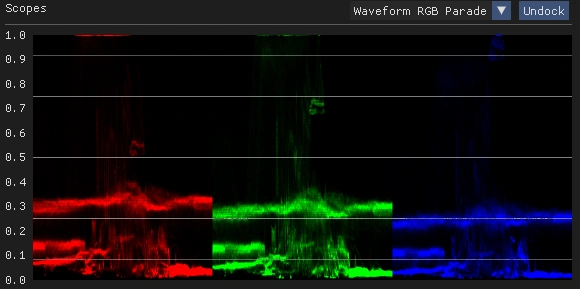
Waveform RGB Parade: Separates the color levels by channel in a waveform/spectral format.
Tweaks
The “Tweaks” section is designed for general adjustments to the image’s brightness, saturation, and other basic settings. It offers quick changes without delving deeply into image formatting. The options are categorized, with each category containing several sub-categories:
-
White Balance: Adjusts colors and tones related to temperature and bright points.
- Temperature: Adjusts the color temperature of the image.
- Lab Offset A: Alters the green and magenta levels of the image.
- Lab Offset B: Alters the orange and blue levels of the image.
-
Exposure: Controls image illumination, lighting, and exposure, with some color adjustments.
- Exposure: Changes how much light the image absorbs. Lower values darken the image, higher values brighten it.
- Contrast: Adjusts the contrast levels of the entire image.
- Gamma: Modifies the image’s overall brightness.
- Filmic Gamma: Adjusts brightness specifically in dark and mid-tone areas.
- Saturation: Controls color saturation. Higher values increase colorfulness, lower values desaturate the image.
- Vibrance: Enhances the intensity of colors. Higher values make colors more vibrant.
-
High Dynamic Range: Fine-tunes the image’s lighting across different brightness levels.
- Shadows: Adjusts the brightness of the grey areas.
- Darks: Controls the brightness of the darkest areas.
- Lights: Sets the brightness of the brightest areas.
- Highlights: Adjusts the brightness of the highest light points. It’s recommended to keep this level above the “Lights” setting.
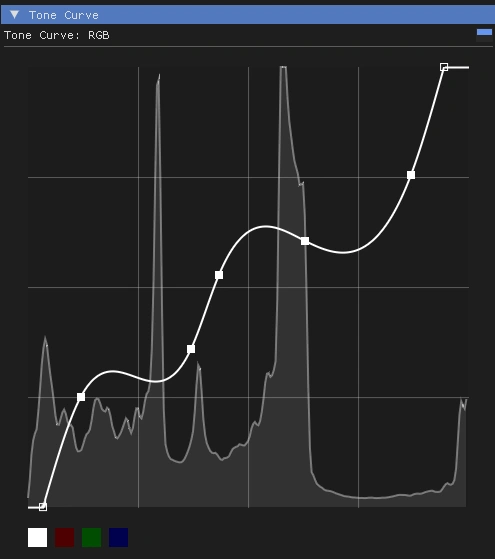
Tone Curves
“Tone Curves” is one of the various interactive widgets available for the user in ReGrade+ , with this, you can make your own tonemap, which means you can choose how bright and dark each color or even the luminance levels are in a curve, essentially change the image lighting level even further to suit your needs.
By default, it comes enabled in the “RGB” mode, which tweaks all of the 3 main colors (Red, Green and Blue) toning and brightness, however, you can change to a per-channel mode by clicking the coloured squares in the lower part of the Graph.
To start using it, click on a point in the graph and move it to start changing the tone curve. To plot a new point, click somewhere else and move that point. The changes, along with the graphic, will all update in real-time.
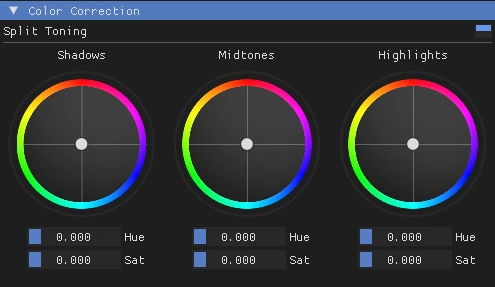
Color Correction
The “Color Correction” section is subdivided in two: “Split Tuning” and a “Color Wheel”.
“Split Toning” allows you to change the colors in a per-light level basis. It has 3 wheels: “Shadows,” “Midtones,” and “Highlights.” There are two ways you can edit those values, you can either click on the point on the center of color wheel and move it on where you want it to be, or you can drag the gauges left and right for more granular and fine-tuning of the values.
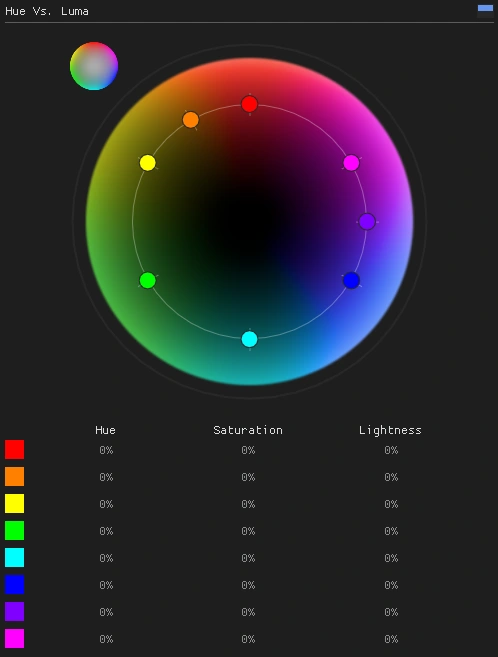
The second wheel allows you to change the color values of Red, Orange, Yellow, Green, Aqua, Purple and Magenta by Luma (brightness) and also Saturation (Amount of Color).
By default, the Color Wheel comes configured to change the color values based on Luma (“Hue vs Luma”), but you can change the values you’re choosing by clicking on the small wheel. This allows you to change between the first mode and the “Hue vs Saturation” mode. To tweak the values, click on the color you wanna change it and move it with the Mouse, by holding the “Shift” key, you can linearly move it in the vertical/diagonal axis, preventing mistakes when you wanna change its saturation or brightness without changing the color tone. To reset the values of a changed color, right click on the point you wanna reset.
While this part of the shader doesn’t allow you to drag any sort of gauges, it allows you to see how much of the values are changed in each section of the spectrum.