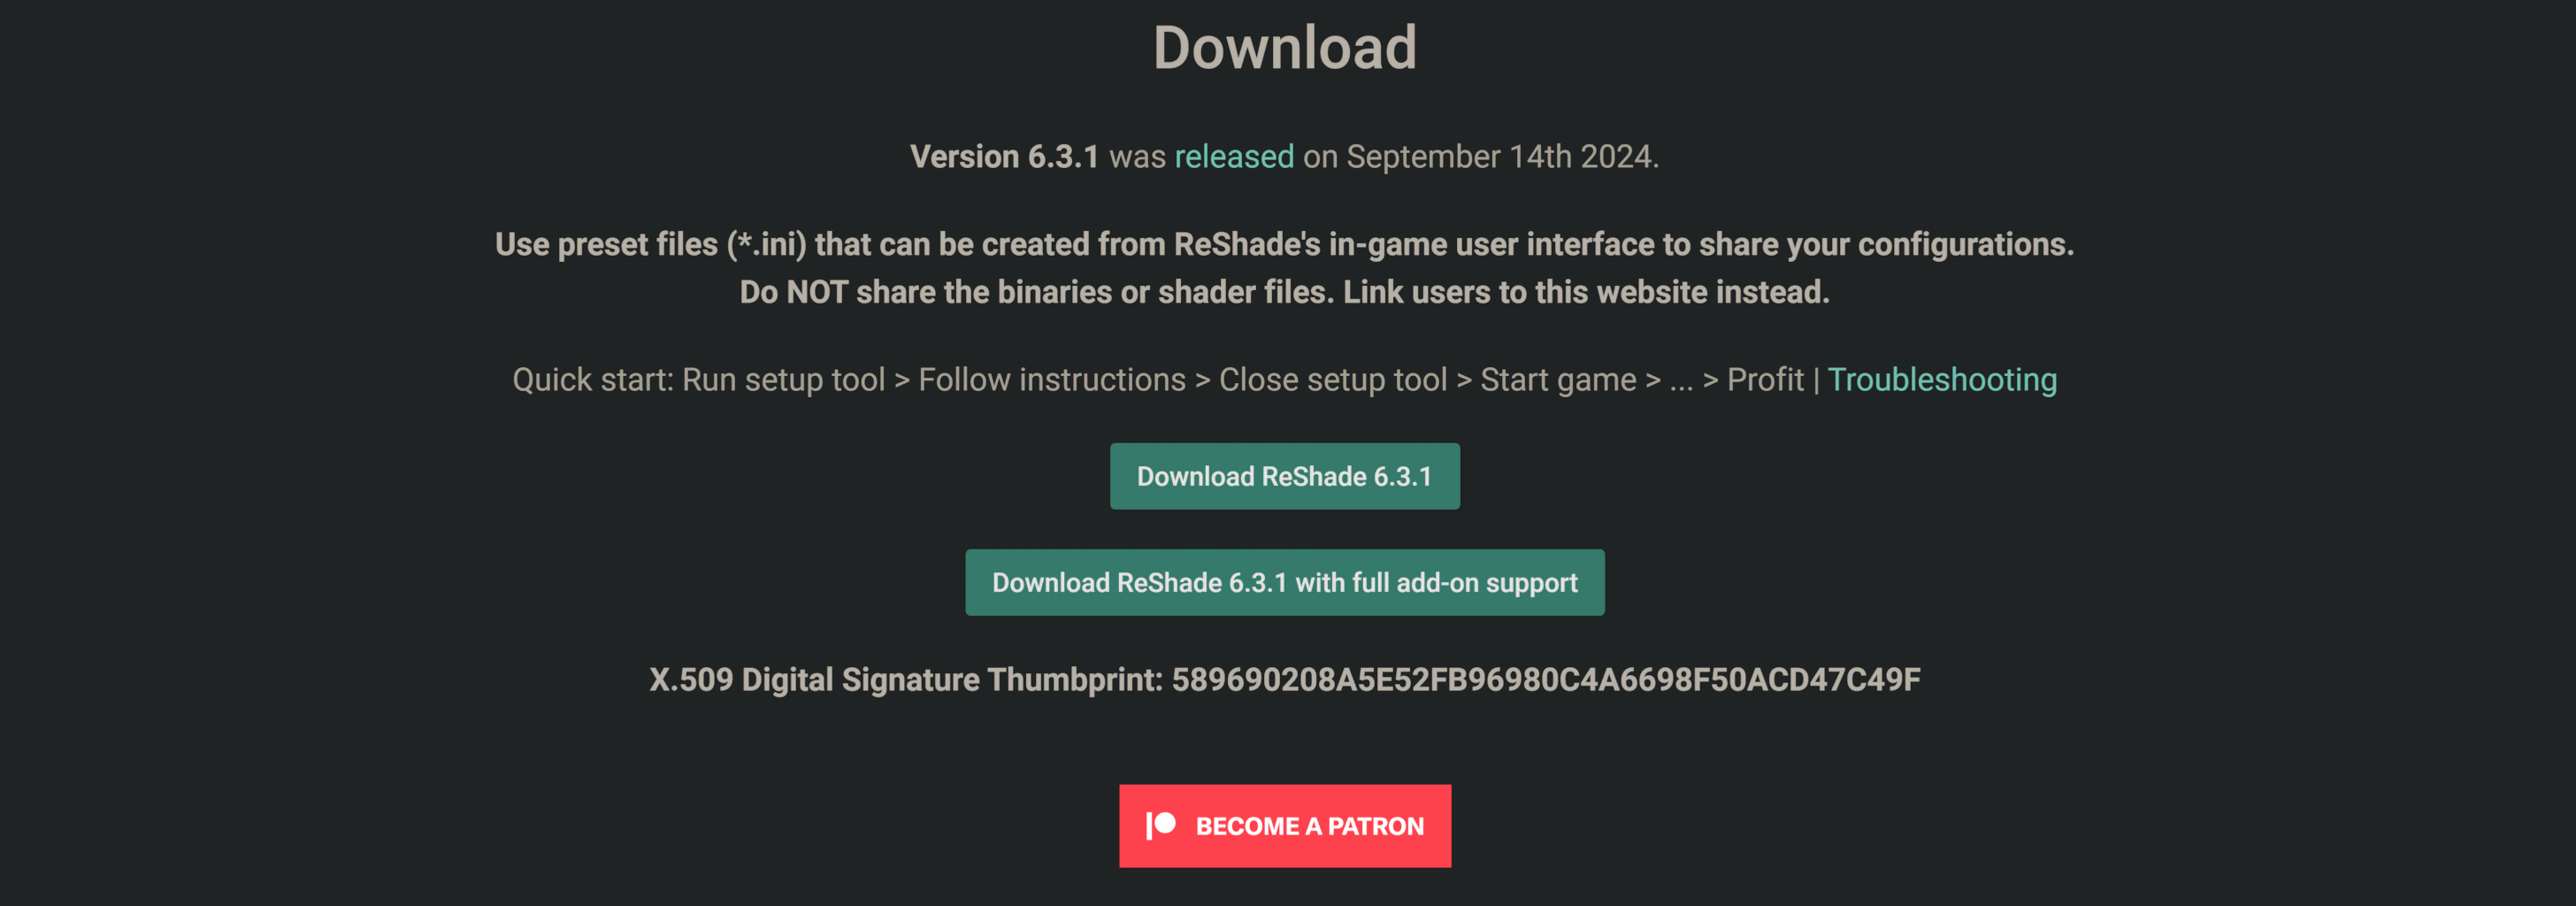
Downloading ReShade
ReShade is a open sourced, generic, post-processing tool that allows users to enhance, define, and create the looks that they desire from their game. Being generic, ReShade allows for these modifications through most games avaliable! ReShade has two different builds avalible for users to download. The Standard, and Full Add-on Support build. Below, you can find information specifically on what differientiates the two builds, and the common usecases for them. The latest version of ReShade will always be avaliable at ReShade’s Homepage.
Standard ReShade Build (Download ReShade x.x.x)
The Standard Build of ReShade is the most common version. It is ideal for online games with strict anti-cheat mechanisms. This build is used for online games due to its limitations to features to prevent misuse and cheating in online games. If you are unsure of what build to pick, this is likely the best choice!
Full Add-On Support ReShade Build (Download ReShade x.x.x with full add-on support)
The Full Add-On Support Build of ReShade is best for offline games or games without anti-cheat systems. This build will offer the full feature set and freedom for creating presets with various shaders and add-ons. If your game is offline, it’s best to choose this build to prevent issues down the line!
Installing ReShade
Each game will have their own process for injecting ReShade. Below will go over the different ways that you can inject ReShade.
ReShade Installer
Selecting Your Game
When opening the ReShade Installer, you’ll be greeted with the option to choose what application that you want to install ReShade to. This part is very important, as if the wrong application or executable is selected, ReShade will not launch when your game starts.
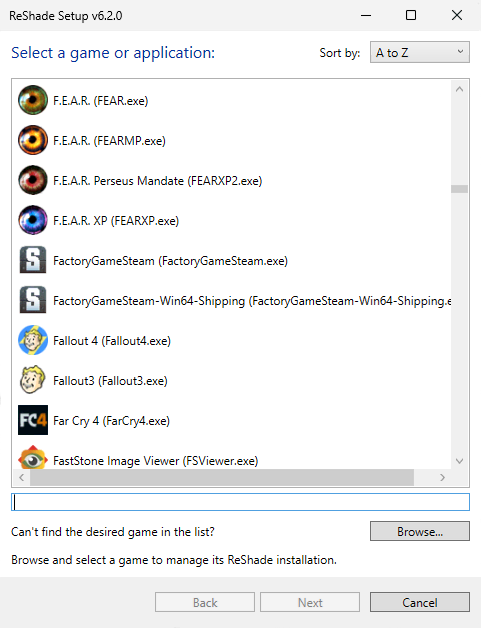
If your game does not appear in the listing, click the “Browse…” button at the bottom right of the ReShade Installer. This button will open up a “File Explorer” window that will allow you to manually find your game’s executable. If you are unsure of where the executable is located, check our guide on finding your game’s executable and directory.
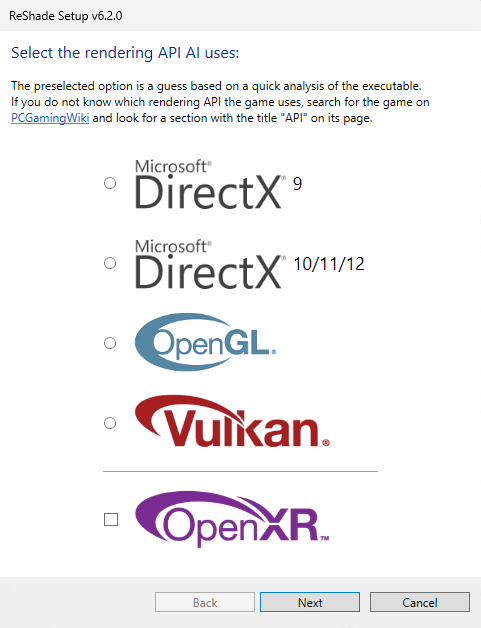
Selecting the Rendering API
In order for ReShade to properly be installed, the ReShade Installer needs to know what Rendering API your game utilizes. The Rendering API has to be selected properly for ReShade to successfully inject, so make sure that you are getting this option correct, otherwise ReShade will not launch with your game. If unsure which API your game uses, check PCGamingWiki for details.
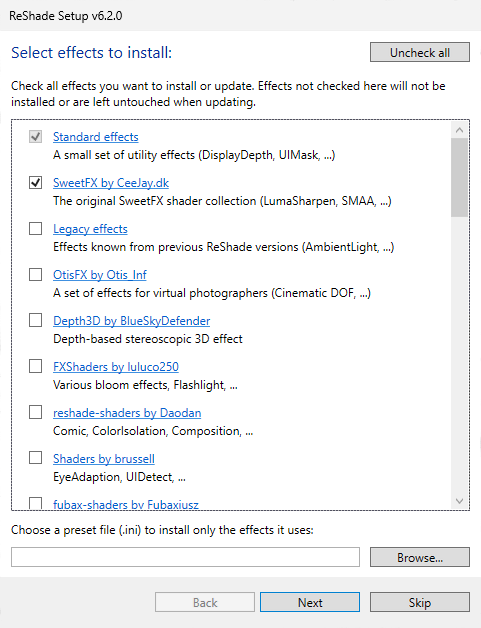
Installing Shaders
In the ReShade installer, shaders are organized into groups called repositories. Each repository has different shaders developed by their repository maintainer. In order to install shaders, simply select the desired repositories and click “Next”. If you’d like to learn more about what each shader repository holds, you can click on the blue highlighted text.
Installing Presets
ReShade presets, stored in .ini files, allow you to apply someone else’s visual configurations. In order to install a preset from another user, click browse at the bottom of the shader installation portion of the installer and then choose your desired .ini file. The ReShade installer will mark every shader used in the preset and install them for you.
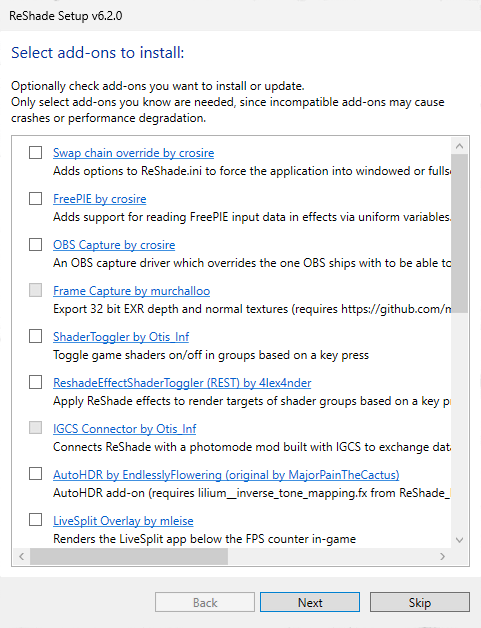
Installing Add-ons (Add-on Support Only)
Add-ons, introduced as a new feature in ReShade, expand customization through the ReShade Add-on API. They’re primarily for users interested in exploring advanced features from both previous shader developers and current add-on creators. Unless you’re familiar with what an add-on does, it’s recommended to avoid selecting any from the list to prevent potential game instability.
Finishing Up
Once the ReShade Installer completes, a confirmation screen will show up. Simply click the “Finish” button at the bottom right of the installer, then launch your game to check that ReShade is fully installed.

Common Issues
Typically, the largest issue when installing ReShade is that the user will select the wrong executable or rendering API for their game. If you encounter issues, revisit the “Selecting Your Game” and “Selecting the Rendering API sections for guidance.
Other potential issues include:
- Game compatibility with ReShade.
- Missing software dependencies, like the .NET Framework.
- Conflicts with other game mods.
Manual Install
Identifying Game Architecture and Rendering API
If you already know your game’s archtecture and Rendering API, you’re more than welcome to skip this part of the guide. However, if you are unsure, make sure to navigate to the PCGamingWiki website.
Download the ReShade Installer
The next step will be to download the latest ReShade installer from the official ReShade website.
Download and Install 7Zip
This guide uses 7Zip in order to extract the ReShade binaries from the ReShade Installer. You can download and install the latest .msi version from 7Zip’s official website. Keep in mind, that WinRar can serve as an alternative, but this guide utilizes 7Zip for convienence.
Extract the ReShade Binary
Once 7Zip is installed, Right-click the ReShade Installer ReShade_Setup_x.x.x.exe, and hover over 7Zip, then select the “Open Archive” option.
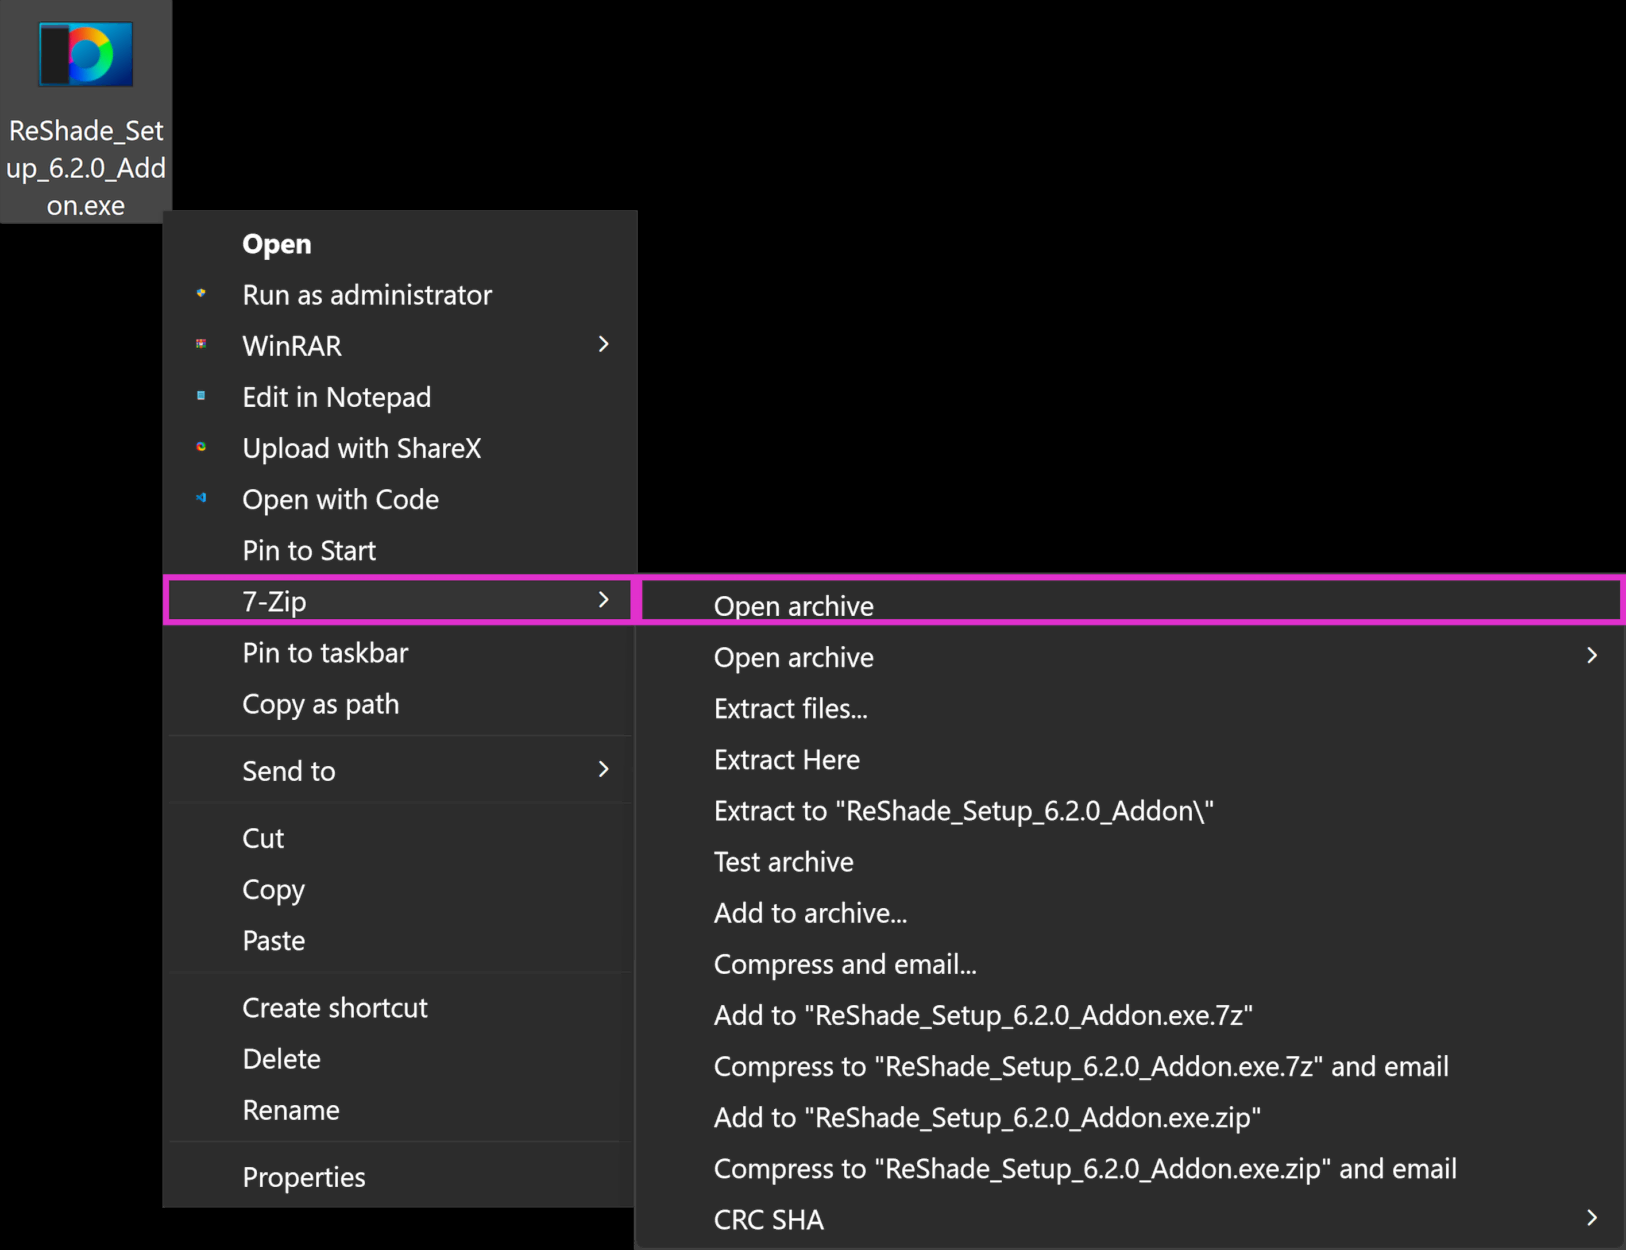
Upon clicking “Open Archive,” a new window will appear that holds the two ReShade binaries. You can extract the DLL that relates to your game’s architecture by draging the file out of the 7Zip window to your Desktop.

| ReShade’s 64-Bit Binary | ReShade64.dll |
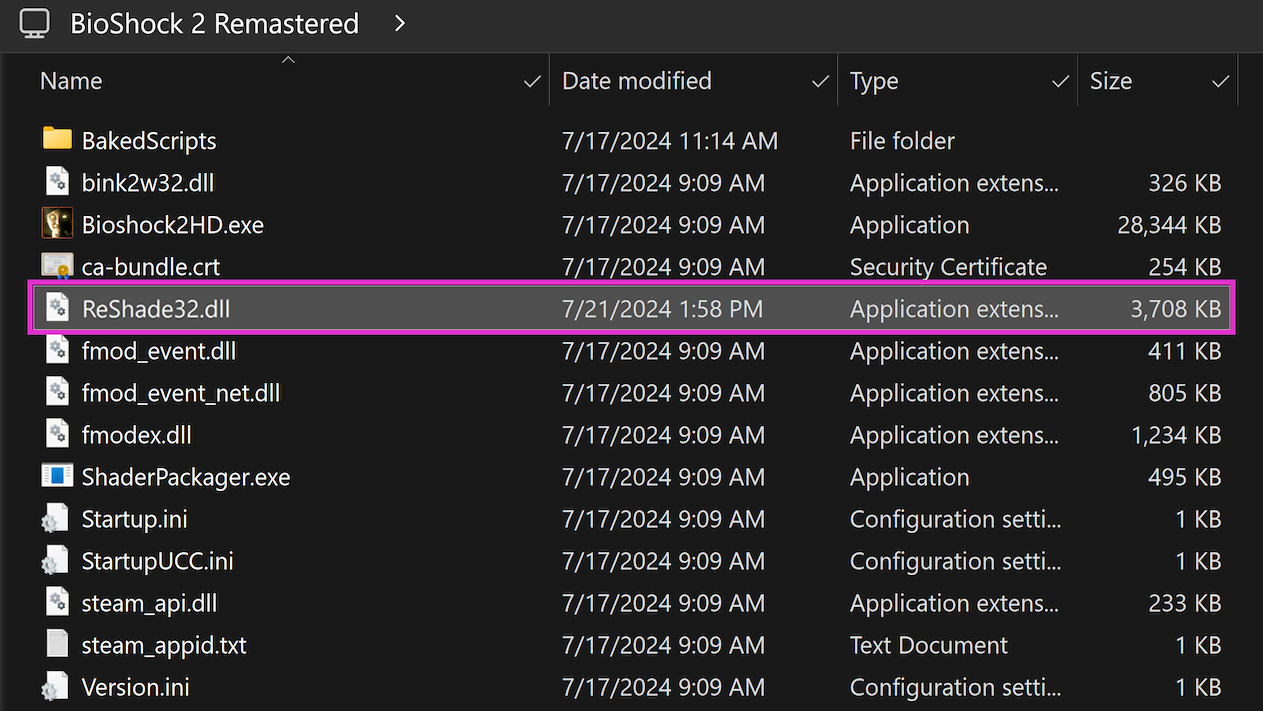
| ReShade’s 32-Bit Binary | ReShade32.dll |
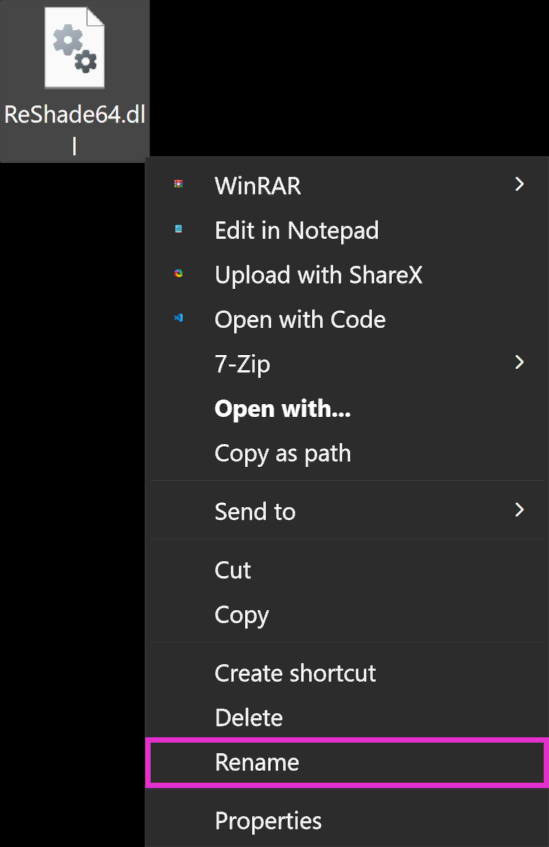
Rename the ReShade Binary
After you’ve extracted the right binary, right-click the ReShadeXX.dll and click “Rename.” Afterwards you can rename the binary to the proper graphics injection name for the Rendering API that your game utilizes.
| DirectX 10/11/12 | dxgi.dll |
| DirectX 12 | d3d12.dll |
| DirectX 11 | d3d11.dll |
| DirectX 10 | d3d10.dll |
| DirectX 9 | d3d9.dll |
| OpenGL | opengl32.dll |
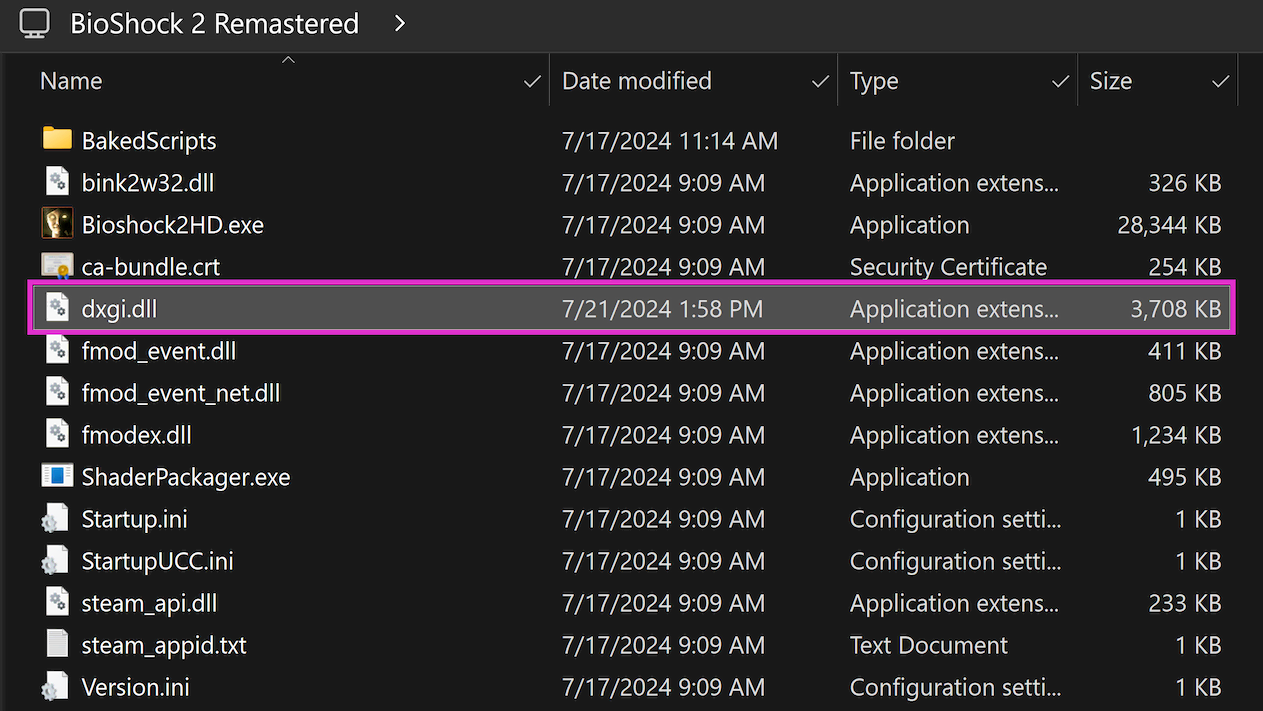
Move the ReShade Binary
Lastly, you will need to move the renamed DLL into the root folder of your game, the same directory where the game’s executable is located. If you’re unsure of your game’s executable location, follow our guide on identifying your game’s executable.
Upon completion, your game should launch with ReShade injected!
Manual Injection
Certain games do not support automatic ReShade injection during runtime.
This is especially common for UWP (Microsoft Store) games, which often disallow automatic injection. Thankfully, Crosire has developed a tool for manual DLL injection into games.
When manually injecting ReShade using Crosire’s Inject Tool, you have to manually install shaders as well.
Identifying Game Architecture and Rendering API
If you already know your game’s archtecture and Rendering API, you’re more than welcome to skip this part of the guide. However, if you are unsure, make sure to navigate to the PCGamingWiki website. This website is home to many wiki pages with just about every game that exists on PC.
Download the ReShade Injector
Choose the injector based on your game’s architecture:
Download the ReShade Installer
The next step will be to download the latest ReShade installer from the official ReShade website. The installer holds the ReShade binaries required in order to manually install ReShade.
Download and Install 7Zip
This guide uses 7Zip in order to extract the ReShade binaries from the ReShade Installer. You can download and install the latest .msi version from 7Zip’s official website. Keep in mind, that WinRar can serve as an alternative, but this guide utilizes 7Zip for convienence.
Extract the ReShade Binary
Once 7Zip is installed, Right-click the ReShade Installer ReShade_Setup_x.x.x.exe, and hover over 7Zip, the select the “Open Archive” option.
Upon clicking “Open Archive,” a new window will appear that holds the two ReShade binaries. You can extract the DLL that relates to your game’s architecture by draging the file out of the 7Zip window to your Desktop.
| ReShade’s 64-Bit Binary | ReShade64.dll |
| ReShade’s 32-Bit Binary | ReShade32.dll |
Move the ReShade and Inject Binary
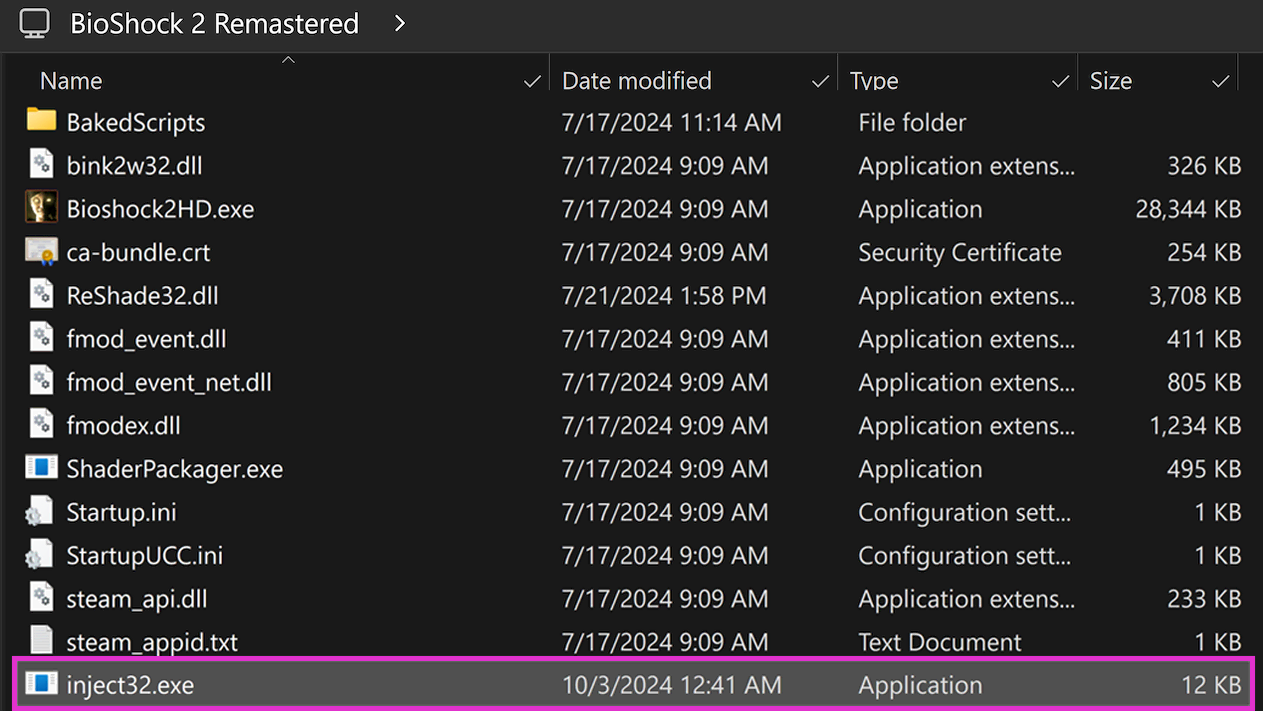
You will need to move the ReShade DLL and Inject EXE into the root folder of your game, the same directory where the game’s executable is located. If you’re unsure of your game’s executable location, follow our guide on identifying your game’s executable.
Manually Inject ReShade
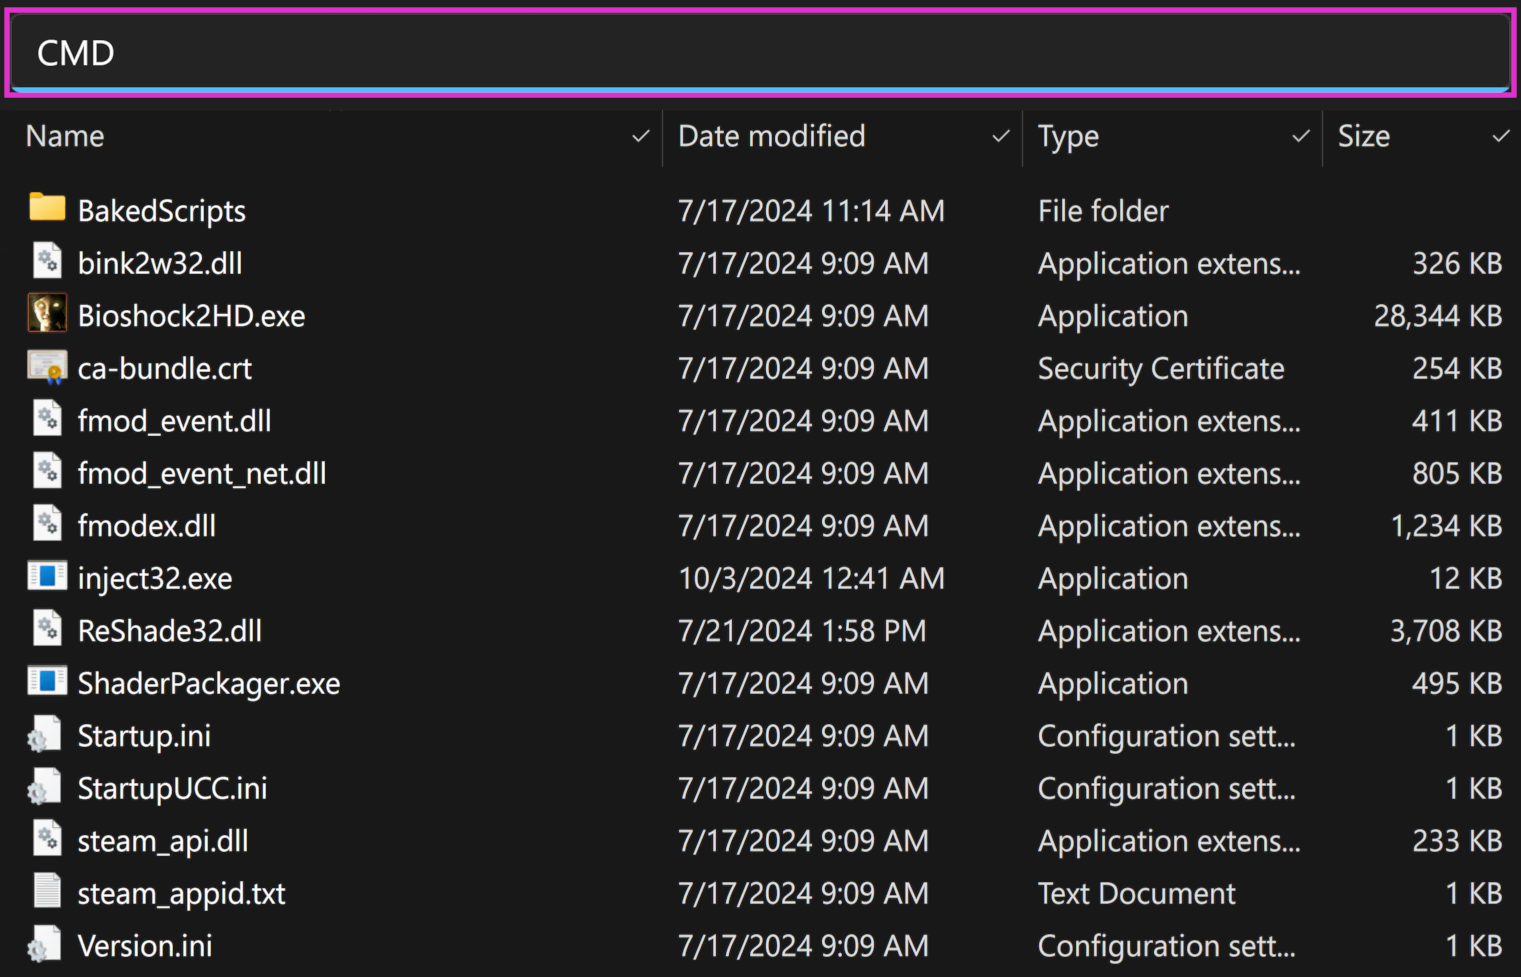
The last step for using the ReShade injector is quite simple, but you may need to follow closely. Make sure to close your game, and then navigate to your game’s directory. Then, open a command prompt terminal by typing CMD into your File Explorer’s address bar.
Once CMD has opened, make sure to type: inject[32/64].exe "name_of_the_process.exe" and hit Enter.
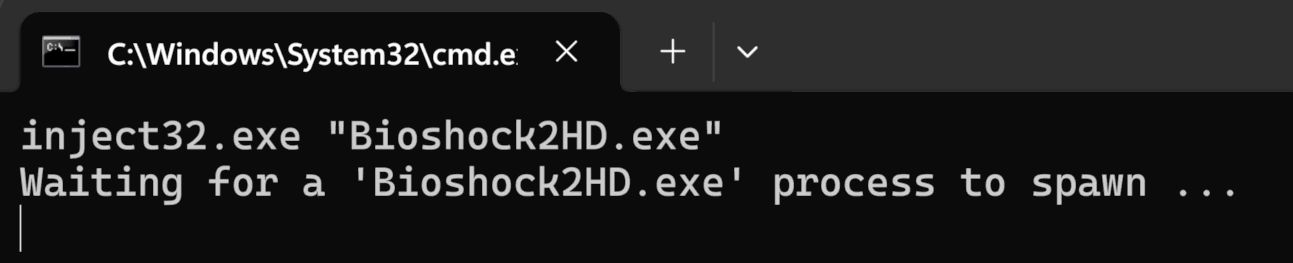
After you’ve hit enter, you will need to launch your game. If successful, ReShade will be injected on the launch of your game!
Manual Shader Install
This guide assumes that you already have ReShade installed and working in your game.
Downloading the Shader Repository(s)
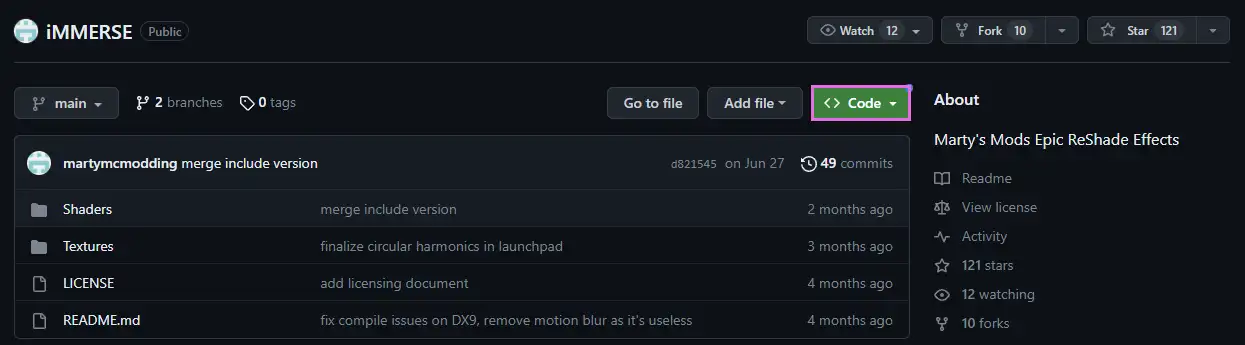
This guide will be utilizing the iMMERSE repository on GitHub, however, you can utilize any shader repository for this guide. It’s also worth noting that not all shader repositories are hosted the same way. So your downloading process may differ from the one shown here.
The first thing that you want to do, is to navigate to the GitHub repository of your choice. Once there, youc an click on the green “<> Code” button at the top right hand side of the repository.
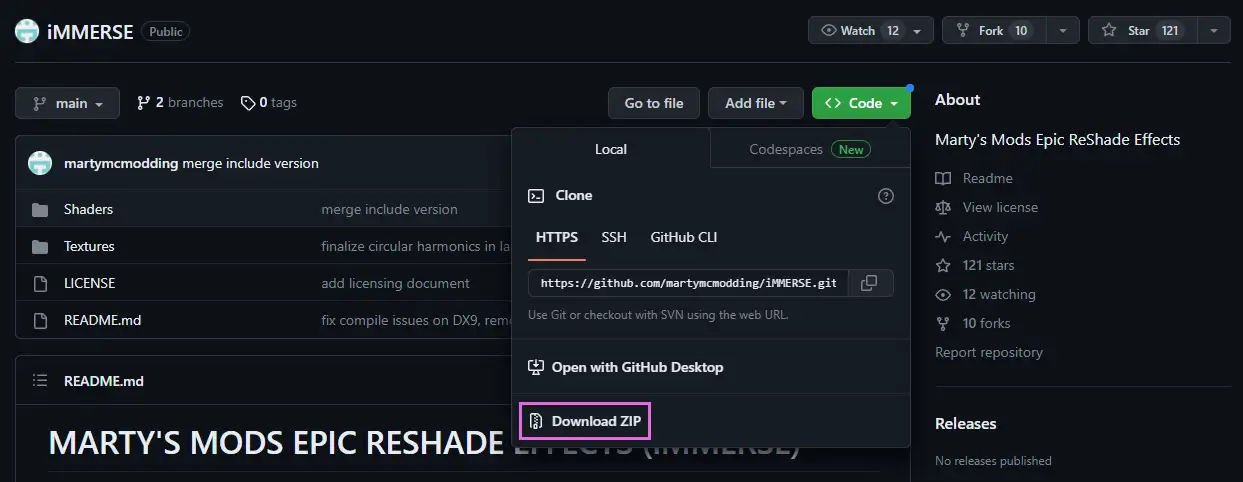
Once you’ve clicked the “<> Code” button in github, a new button should appear within a dropdown called “Download ZIP.” Click this and wait for the download to finish.
Move the Shader Repositories Files to the Right Location
Now that you have all of the required files from the shader repository of your choice, you can navigate to the “ReShade-Shaders” folder that exists in the same directory as both your ReShade binary and game executable. Once there, open up the archive that you downloaded for the shader repository and merge the “Shaders” and “Textures” folders from the archive into the “ReShade-Shaders” folder.

If Windows warns you of files already existing in that location with the names, simply click “Replace the files in the destination.”

ReShade Settings for Shaders and Textures
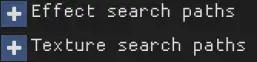
If your ReShade install doesn’t detect any new shaders installed, it’s best to check the settings tab and verify that your shader’s and texture’s paths are set up correctly. These specific options are called “Effect Search Path” and “Texture Search Path.”
You want to make sure that these two settings look identical to the configurations that are given below.

| Effect Search Path | .\ReShade-Shaders\Shaders\** |
| Texture Search Path | .\Reshade-Shaders\Textures\** |
If you do not have a free slot to add a search path for, you can click the “+” icon located directly under the search paths!