Depth Buffer
The depth buffer is a crucial part of any 3D game. It is a single channel image buffer which contains information about the distance of the scene to the camera, per pixel. Many ReShade effects depend on it and will not work correctly. ReShade’s built in “Generic Depth” Add-on scans the game data for the (likely) correct depth buffer and forwards it to the shaders. In the following sections, you’ll learn how to verify the depth settings are correct and how to fix common issues.
Viewing ReShade’s Depth Buffer
To see ReShade’s depth buffer, enable the shader “DisplayDepth”. This shader is included with all ReShade installations through the ReShade Installer. If you do not have it, you can manually install it from Crosire’s ReShade-Shaders repository. The image below shows what the output should look like. The depth buffer is on the right side, and the normal buffer (generated from depth) is on the left side.
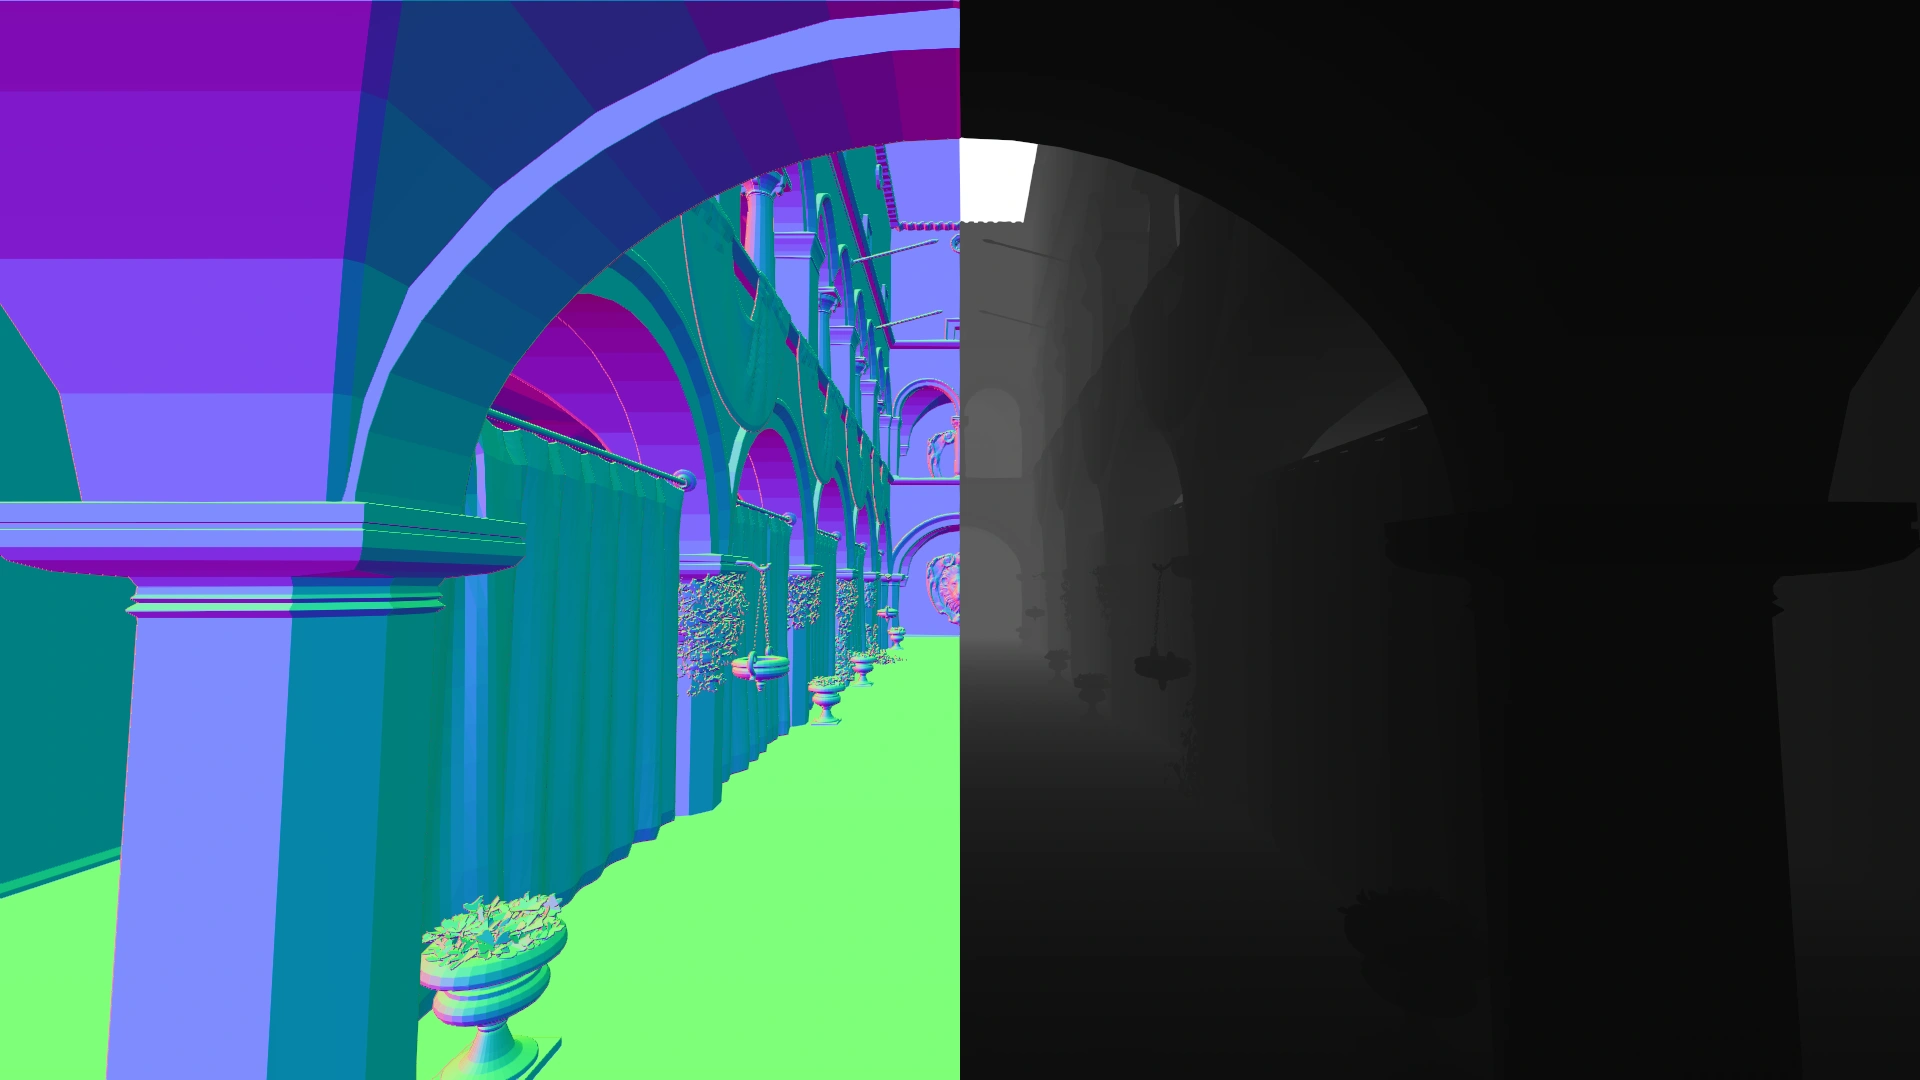
If your depth does not look like the image above, continue onwards.
Finding the Right Depth Buffer
Finding the correct depth buffer in ReShade can be tricky, but this guide will walk you through some of the common issues and annoyances that users might face. Keep in mind that this guide is very general, and each game may respond differently when using ReShade’s Generic Depth addon.
First, open up ReShade’s “Addons” tab and focus on the “Generic Depth” addon.

Here, you will find settings for automatic depth buffer selection and the depth buffers that are available to you.
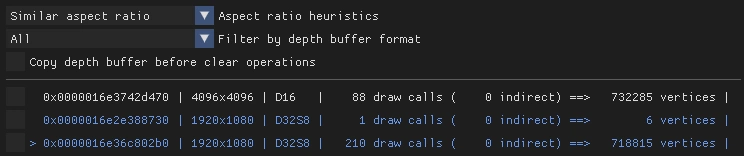
With “DisplayDepth” enabled, click through each depth buffer that is available and find the one that most closely resembles what is in your game. The depth buffer you are looking for is likely to be the same resolution as your game and typically has the highest draw calls or vertices. If the buffer looks incorrect (e.g., it’s completely black, white, or flat), try another option. In some games, the depth buffer might not be accessible due to the way the game engine handles rendering, in which case, you may need to adjust settings or use other troubleshooting methods. Continue adjusting until the depth buffer output in “DisplayDepth” matches the expected visual result.
Common Depth Buffer Issues
-
Upside Down Depth Buffer: The image shows an upside down depth buffer. You can solve this issue by simply inverting the
RESHADE_DEPTH_INPUT_IS_UPSIDE_DOWNpreprocessor setting within the “Global Preprocessor Definitions” under the “Home” tab of ReShade. If it is set to 1, set it to 0 and vice versa.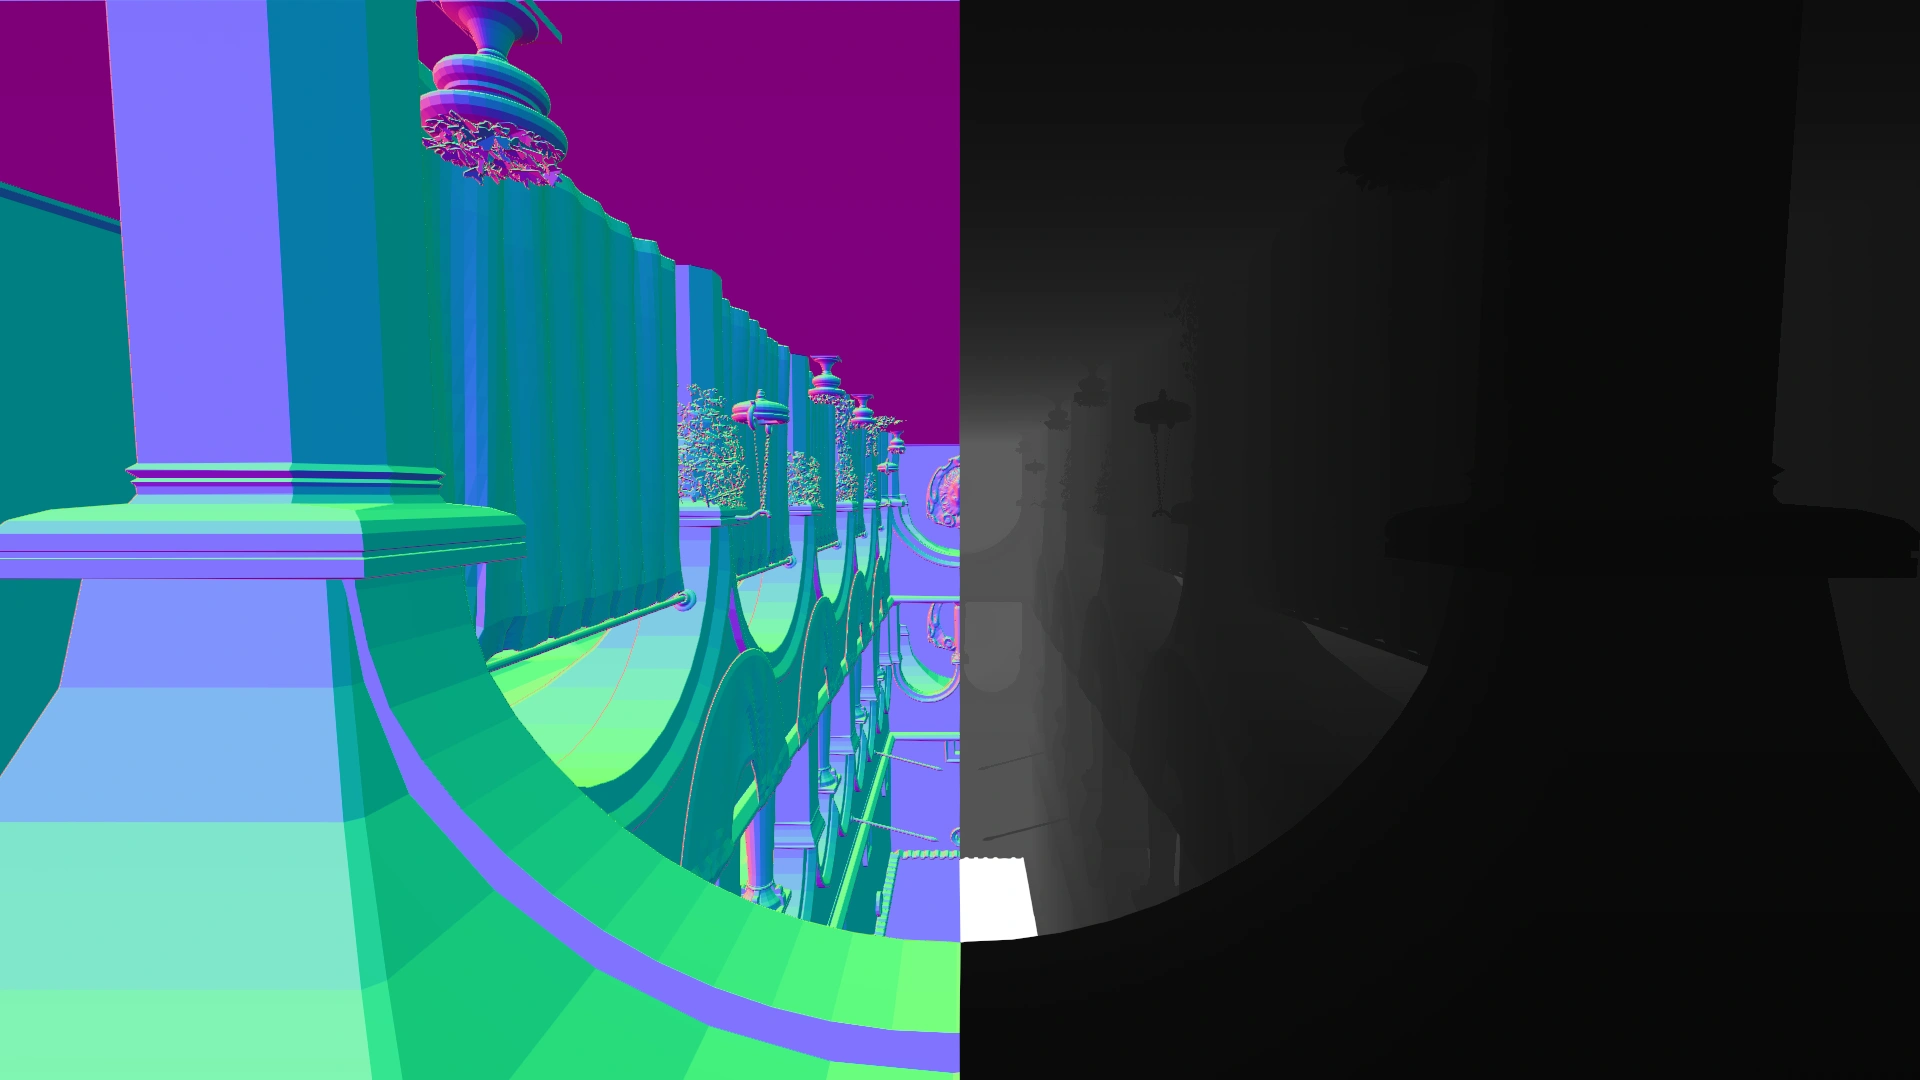
-
Reversed Depth Buffer: The image shows a reversed depth buffer. You can solve this by inverting the
RESHADE_DEPTH_INPUT_IS_REVERSEDpreprocessor setting within the “Global Preprocessor Definitions” under the “Home” tab of ReShade. If it is set to 1, set it to 0 and vice versa.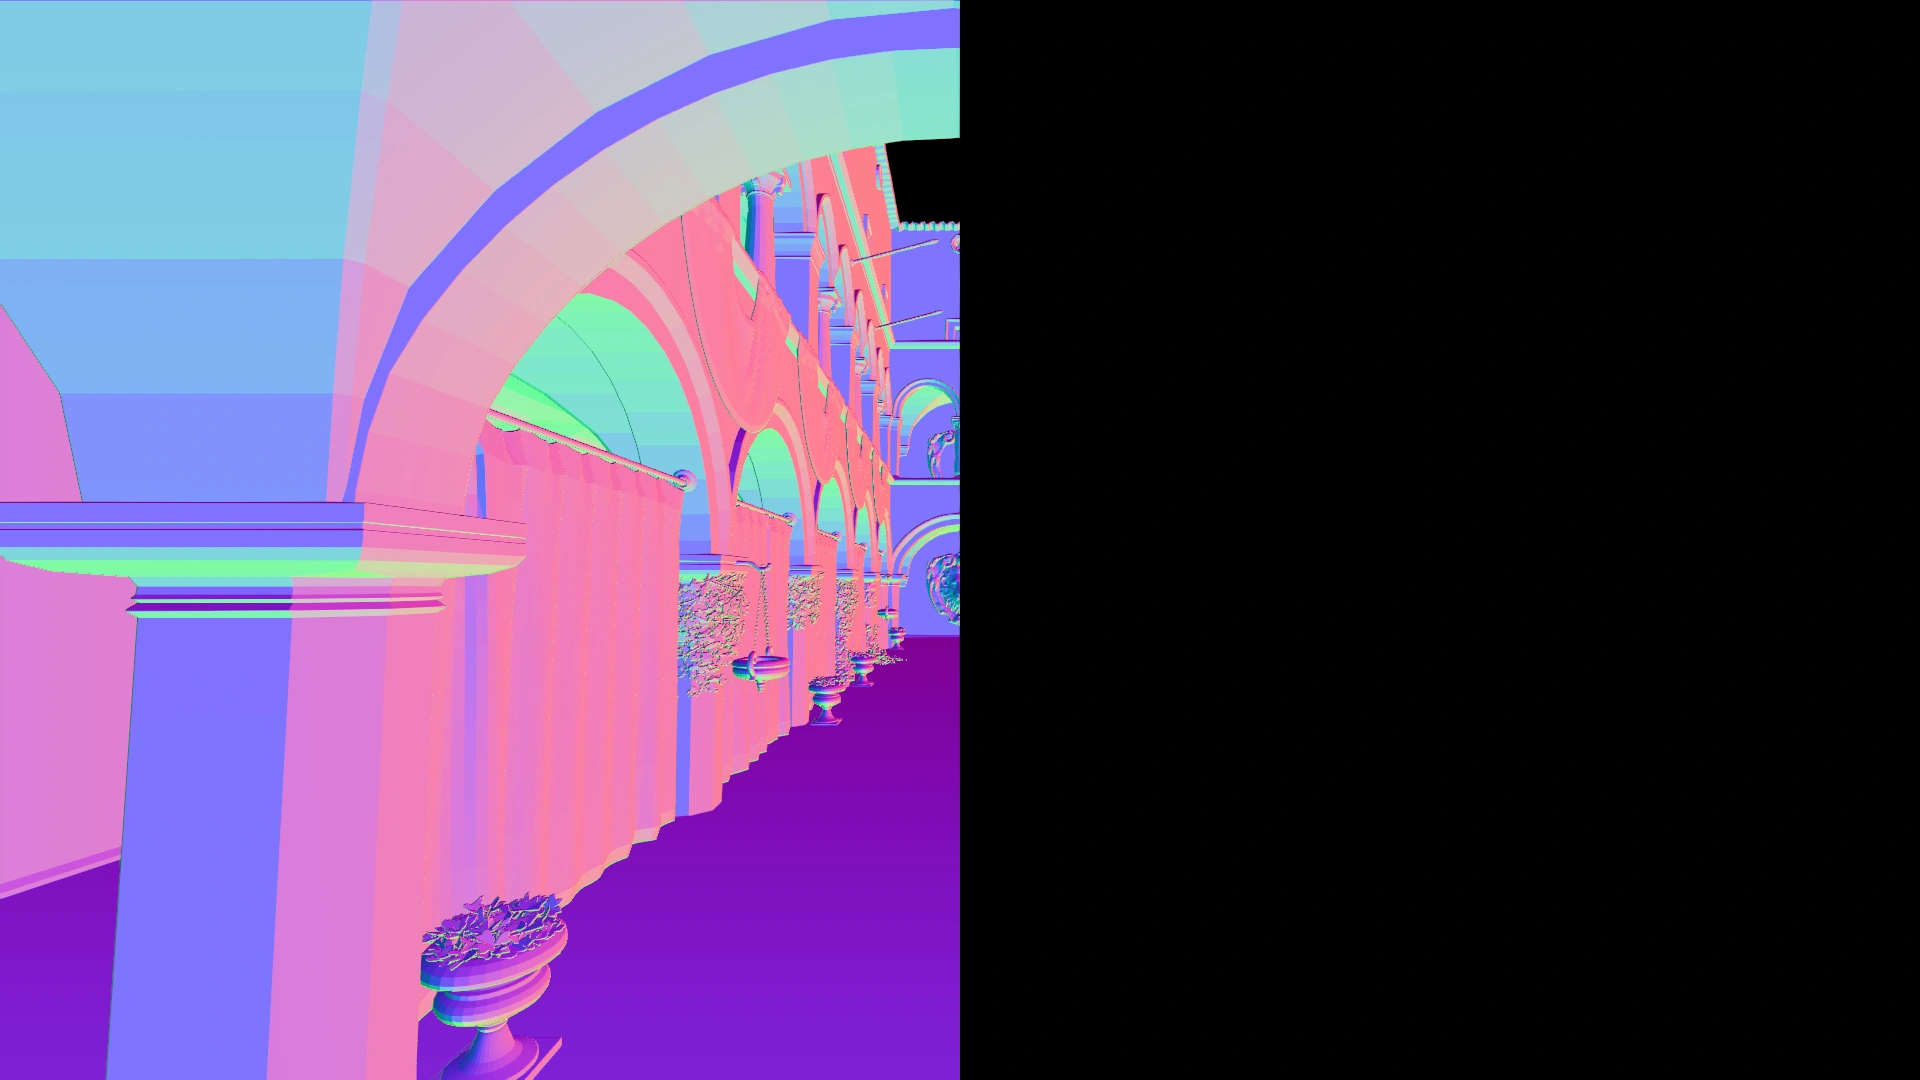
-
Empty Depth Buffer: The images show a depth buffer that is empty. This could be the result of choosing the wrong depth buffer, or a setting in-game that is blocking ReShade from accessing it. The issue is typically resolved by ensuring that MSAA is not enabled or by choosing the proper depth buffer.


Basic troubleshooting steps to find a depth buffer with data:
- Toggle on and off “Copy depth buffer before clear operations” and “Copy depth buffer before fullscreen draw calls”.
- Select the depth buffer with the closest resolution to your game resolution.
- Select the depth buffer with the highest amount of draw calls and verticies.
Global Preprocessor Settings
-
RESHADE_DEPTH_INPUT_IS_REVERSED: This preprocessor setting is crucial when the normals appear correctly, but the depth image itself is missing or incorrect. The setting can be either
1or0. If the depth isn’t displaying as expected, toggling this value often resolves the issue. Essentially, this setting flips the depth direction, correcting the depth buffer’s interpretation in some games. -
RESHADE_DEPTH_INPUT_IS_UPSIDE_DOWN: If the depth image, as displayed by the DisplayDepth shader, is upside down, this setting is the fix. Like the previous setting, the value can only be
1or0. Flipping the value corrects the orientation of the depth buffer. This is often required in games that render the depth buffer differently from what ReShade expects. -
RESHADE_DEPTH_INPUT_IS_LOGARITHMIC: This setting addresses issues where the depth buffer appears with numerous waves or “stripes.” While not common, some games use a logarithmic depth buffer, and this setting compensates for that. The value is binary (
1or0). You may need to experiment with this setting if you encounter these artifacts in the depth view. -
RESHADE_DEPTH_INPUT_X_SCALE and RESHADE_DEPTH_INPUT_Y_SCALE: These settings allow you to adjust the scaling of the depth buffer along the X and Y axes. The values you input will multiply the current depth buffer dimensions. Use the DisplayDepth shader to test and fine-tune these values before setting them globally. This is particularly useful in games where the depth buffer might be compressed or stretched.
-
RESHADE_DEPTH_LINEARIZATION_FAR_PLANE: This setting modifies the far plane of the depth buffer’s linearization process, affecting how depth is interpreted across the visible range. If the depth gradient (black to white, close to far) isn’t spanning correctly, shaders relying on depth may not function as expected. Adjusting this value can help in fine-tuning the depth range, but finding the right balance may require some trial and error.
-
RESHADE_DEPTH_INPUT_X_OFFSET and RESHADE_DEPTH_INPUT_Y_OFFSET: These settings allow you to offset the depth buffer in the X and Y directions, effectively moving it left/right and up/down, respectively. This is useful when the depth buffer is misaligned with the game’s visual output. Adjustments here can correct such alignment issues by nudging the depth buffer into place.
-
RESHADE_DEPTH_INPUT_X_PIXEL_OFFSET and RESHADE_DEPTH_INPUT_Y_PIXEL_OFFSET: Similar to the previous offset settings, these allow for pixel-level adjustments, giving you finer control over the depth buffer’s positioning. This is particularly useful when small misalignments occur that require more precise tuning than what the regular X and Y offset settings provide. Adjusting these values moves the depth buffer incrementally, perfect for aligning it with high precision.